Signing your documents is easy. Simply follow these steps:
STEP 1: Open or create your document in Adobe Acrobat.
STEP 2: On the top right there are tabs, click on Sign.
STEP 3: Then, select the lowest tab that drops down Work with Certificates.
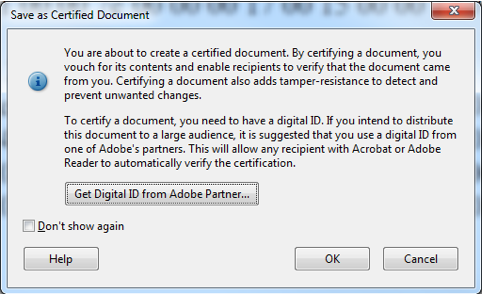
STEP 4: To timestamp, digitally sign and keep the document valid after the certificate expires, select one of the Certify options Visible or Not Visible, whichever suits your document.
STEP 5: Then, click and drag where you want your signature to appear on the page(s).
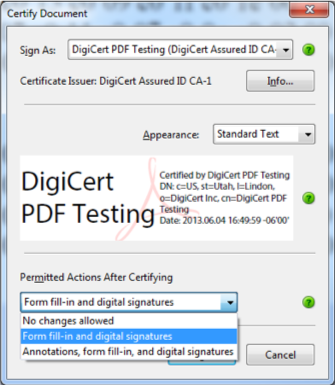
STEP 6: A dialog box will appear which allows you to select Sign As with a dropdown menu. This will display your Digital ID.
STEP 7: Inside the dialog box, if you would like to check the certificate details, simply click on the Info icon.
STEP 8: To change how your signature appears, click on the Appearance dropdown menu and select a signature you have used previously or click on Create your own to add an image or change the size, font, or exclude or include other information on the document.
STEP 9: Then under the Permitted Actions After Certifying dropdown menu, you have the option to limit or expand the available actions of those who open the document.
STEP 10: Next, click on Sign. You can now send your document!
Certifying your documents
Certifying your document marks your document and sets your specifications selected for each document. You can choose to send the document and not allow any changes and add tamper-resistance to your document. That means your document will have a warning dialog box if your document was altered.