Getting your DigiCert document signing token ready to use
These instructions explain how to activate your secure token, enabling you to sign documents with a digital signature using your DigiCert Document Signing Certificate.
Did you receive your preconfigured DigiCert Document Signing Certificate token via email? Then, we already installed your document signing certificate on your token. Now, you just need to set up your token so that you can start adding your digital signature to important documents.
Do you have a Retail/MPKI account? See the Setting Up Your DigiCert Provided Document Signing Token instructions.
Complete the following steps to start signing documents with your document signing certificate:
- Activate Your Token
- Obtain Your Preassigned Password
- Install the SafeNet Driver and Client Software (Windows)
- Change Your Token Password
- Sign Documents
-
On the computer from which you want to sign documents, log in to your CertCentral account.
-
In your account, in the sidebar menu, click Certificates > Orders.

-
On the Orders page, use the drop-down lists, search box, advance search features (Show Advanced Search link), and column headers to filter the list of certificates.
-
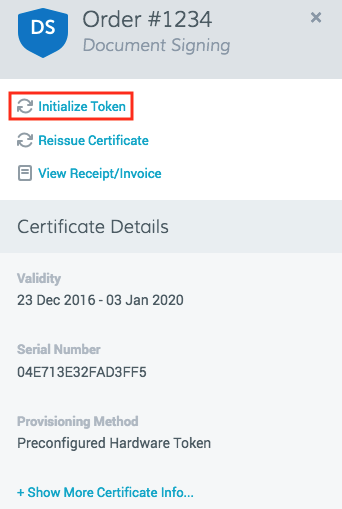
In the Order # column of the Document Signing Certificate you need to activate, click the Quick View link.
-
In the Order number details pane (on the right), click Initialize Token.
-
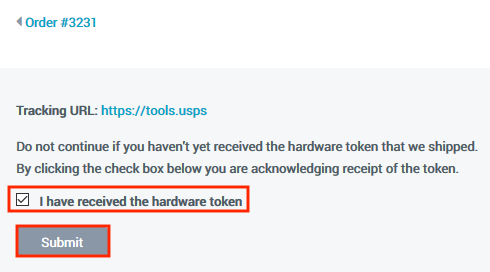
Have you received your token?
-
Yes – On the Order number page, check I have received the hardware token, click Submit, and continue to Step 2.
-
No – Do not proceed. Leave the page and wait for your token to arrive before continuing.
-
-
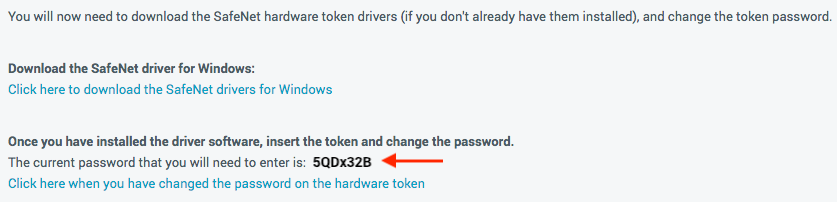
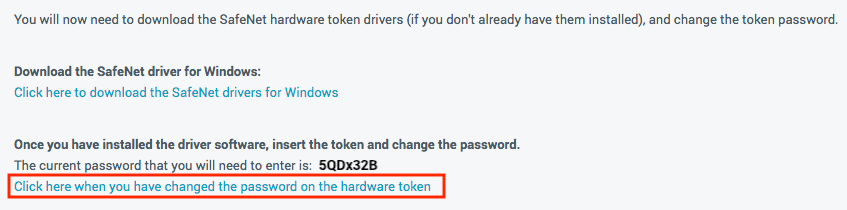
On the Document Signing Hardware Token Order page, under Once you have installed the drive software, insert the token and change password, record your DigiCert provided password.
Important: Your preassigned password will only be visible once. Make sure to take note of this password so you can access the certificate on your token.
-
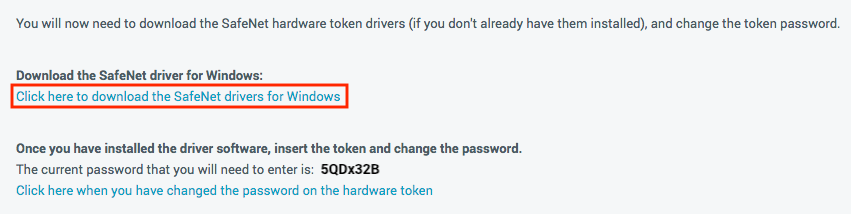
On the Document Signing Hardware Token Order page, under Download the SafeNet driver for Windows, click the Click here to download the SafeNet drivers for Windows link to download the SafeNetAuthenticationClient-64x.msi.
The SafeNet drivers allow you to enable document signer authentication. Once enabled, SafeNet pops up before you sign a document and requires you to enter a password to verify that you are the actual signer.
Drivers Note: You will need to install the SafeNet drivers and client software on any computer from which you want to use your Document Signing Certificate token to sign documents.
Do you need driver software for other OS platforms? Please email Support at support@digicert.com or call Support at 1-801-701-9600.
-
Run the SafeNet Authentication Client installer (double-click SafeNetAuthenticationClient-x64.msi).
-
In the SafeNet Authentication Client Setup Wizard, complete the following steps to install the drivers:
-
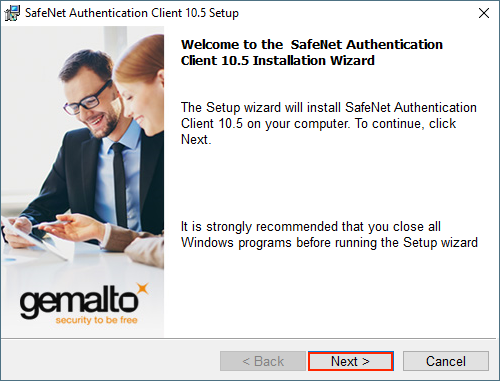
On the Welcome to the SafeNet Authentication Client Installation Wizard page, click, Next to begin the software installation process.
-
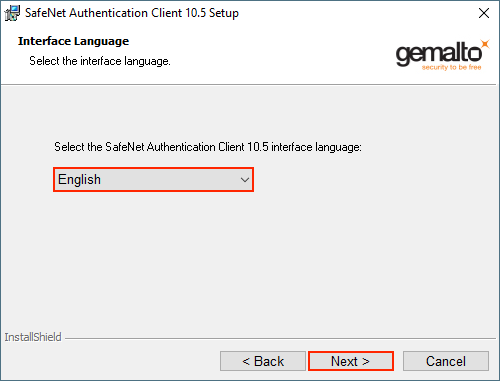
On the Interface Language page, in the drop-down list, pick a language for the interface and then click Next.
-
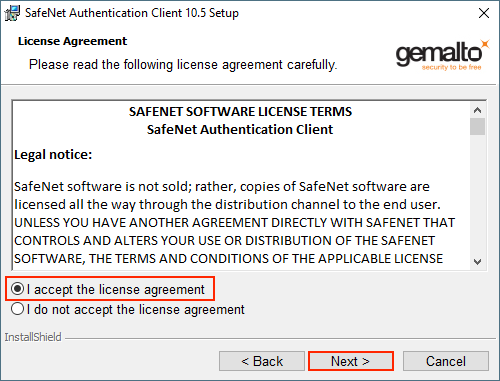
On the License Agreement page, read through the license agreement, select I accept the license agreement and then click Next.
-
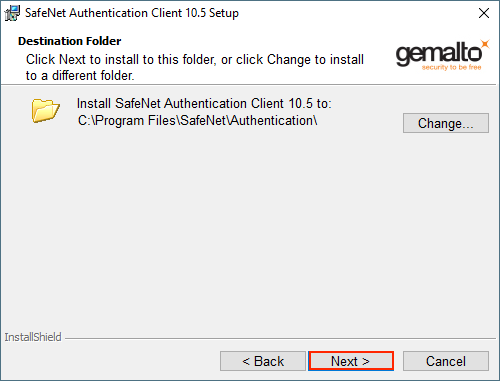
On the Destination Folder page, choose where you want to install the SafeNet Authentication Client and then click Next.
-
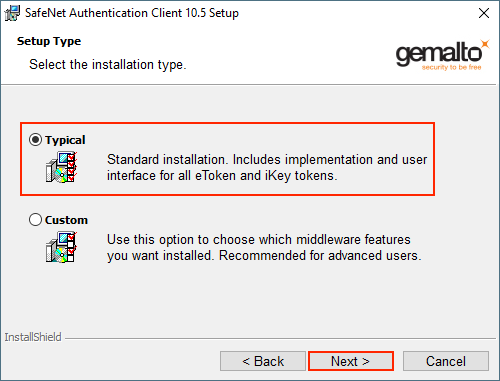
On the Setup Type page, select Typical for the installation type and then click Next.
-
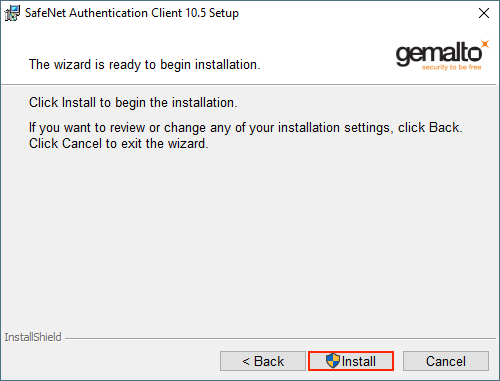
On The wizard is ready to begin installation page, click Install.
-
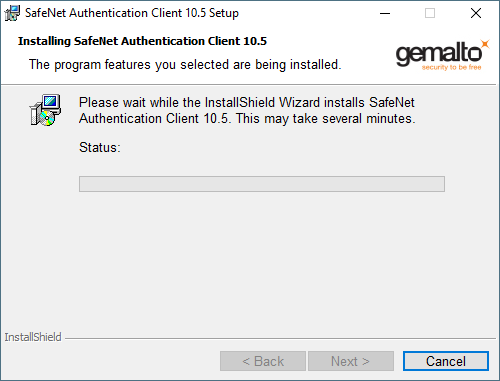
It may take a few minutes to install the software.
-
On the SafeNet Authentication Client has been successfully installed page, click Finish to exit SafeNet Authentication Client Setup.
-
You have successfully installed the SafeNet Client Software.
-
-
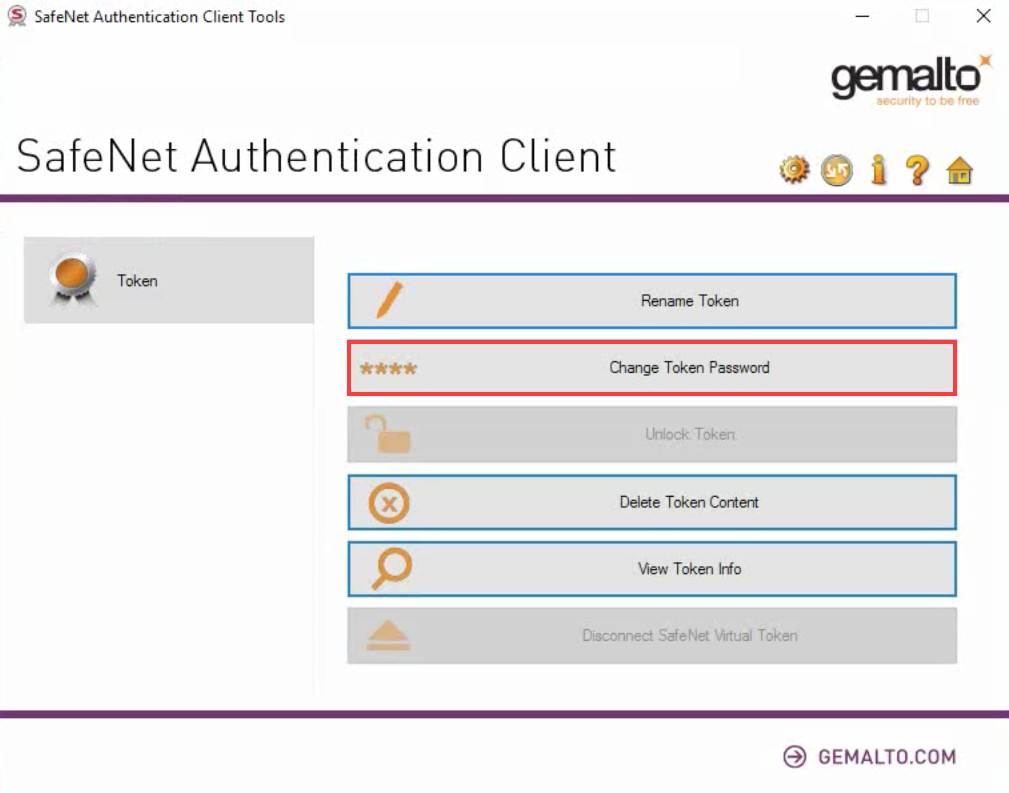
To change the password, complete the following steps:
It is important to complete this step to change your password.
-
DigiCert Document Signing Certificate token.
-
Open SafeNet Authentication Client Tools.
-
In the SafeNet Authentication Client Tools window, click Change Token Password.
-
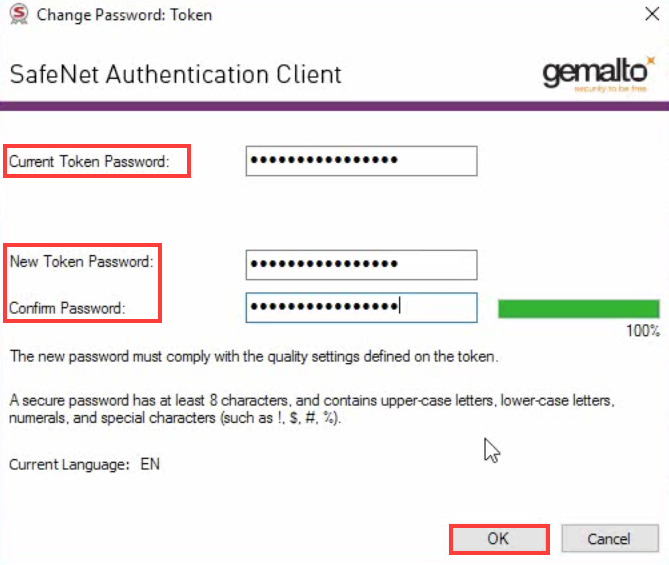
On the Change Password Token page, in the Current Token Password box, enter the password that you retrieved from the Document Signing Hardware Token Order page (see Step 2).
-
In the New Token Password and Confirm Password boxes, create and confirm your new token password.
-
Click OK.
-
-
On the Document Signing Hardware Token Order page, click the Click here when you have changed the password on the hardware token link.
-
You're done! You can begin using your DigiCert Document Signing Certificate to sign documents.
-
For instructions on how sign documents with your document signing certificate, see the topics below.
For instructions on how to set up your token and to install and rekey your document signing certificate, scroll to the end of our TLS/SSL, code signing, document signing certificates' support page.
Step 1: Activate Your Token
Wait until you've received your secure token from DigiCert before you start these instructions.
Step 2: Obtain Your Preassigned Password
Step 3: Install the SafeNet Drivers and Client Software (Windows)
Step 4: Change Your Token Password
As a security precaution, we recommend changing the password for your SafeNet eToken after installing the drivers.