- Contact Us
-

choose your language
-

Knowledge Base
CertCentral | Setting up your DigiCert Hardware token for Document Signing
Learn how to set up your DigiCert-provided hardware token for Document signing.
Please make sure you meet these prerequisites:
- DigiCert-provided hardware token: SafeNet 5110 CC, SafeNet 5110 FIPS, or SafeNet 5110+ FIPS.
- Access to your certificate's Order details page in CertCentral.
- Document Signing certificate order number.
- Administrator permissions on your computer.
- Secure password manager. See Passwords 101.
Important: If you incorrectly enter a password too many times, you can permanently disable your eToken. We recommend using a secure password manager to track the passwords used for initializing your eToken. |
Install your Document Signing certificate on your eToken
- In your CertCentral account, in the left main menu, go to Certificates > Orders.
If you do not see the above in your account, please follow these instructions:
In your CertCentral account, in the left main menu, click on My Digital Trust Products > Certificates
- On the Orders page, select the certificate's order number.
If you do not see the above in your account, please follow these instructions:
On the Certificates page, select the certificate's order number.
- On the certificate's Order details page, under Certificate status you will see the section “What do you need to do”
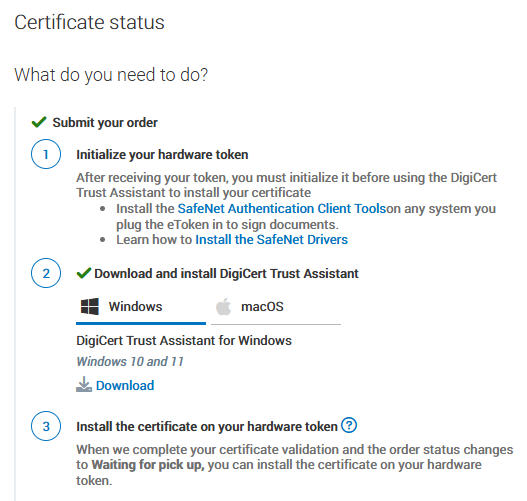
- Step One: Install the SafeNet Authentication client and initialize your token.
- Step two: Download and install DigiCert Trust Assistant
- Step Three: Install your certificate on your DigiCert provided hardware token
Step One: Install the SafeNet Authentication client and initialize your token.
Please refer to the following guides on how to install the SafeNet Authentication Client:
- How to Install the SafeNet Drivers and Client Software (Windows)
- How to download SafeNet Authentication Client
Once you have installed the SafeNet Authentication Client, you proceed to initialize your eToken.
- Plug your eToken directly into your machine.
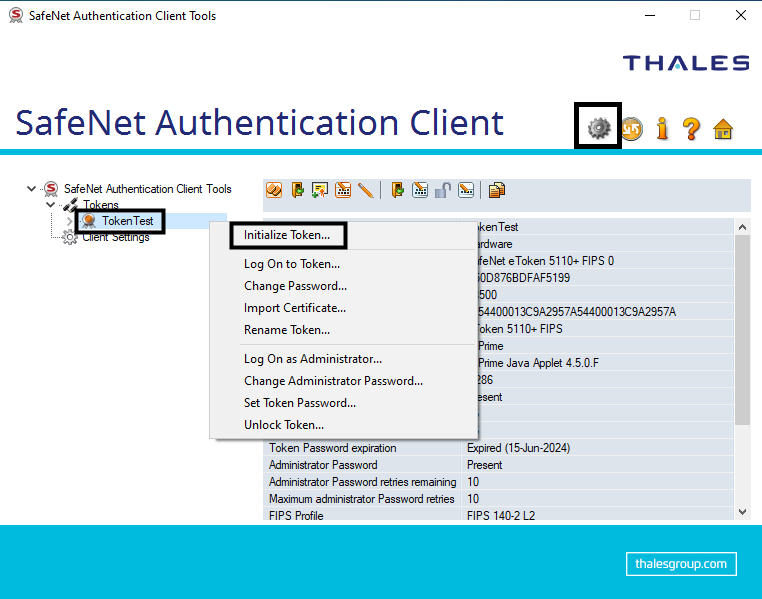
- Open the SafeNet Authentication Tool.
- Click on the Gear Icon in the top right corner, right click on your token and click on Initialize Token…
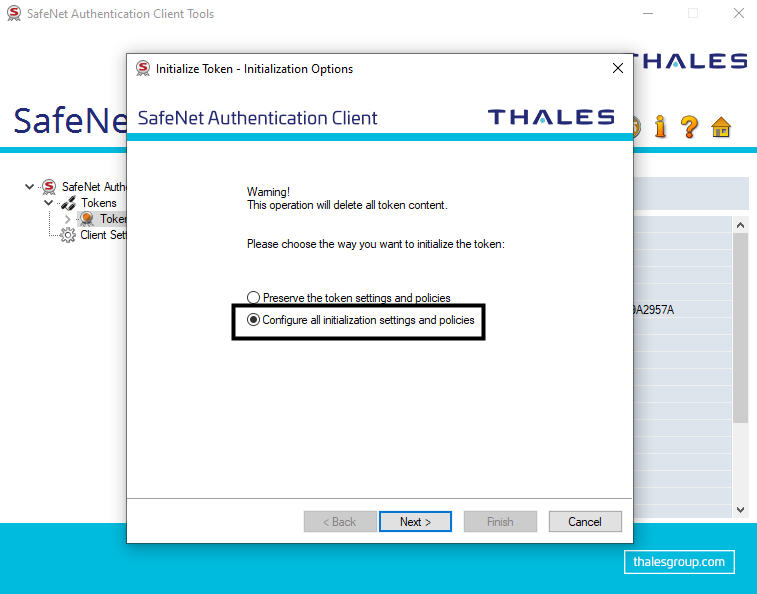
- Select Configure all initialization settings and policies and click Next >
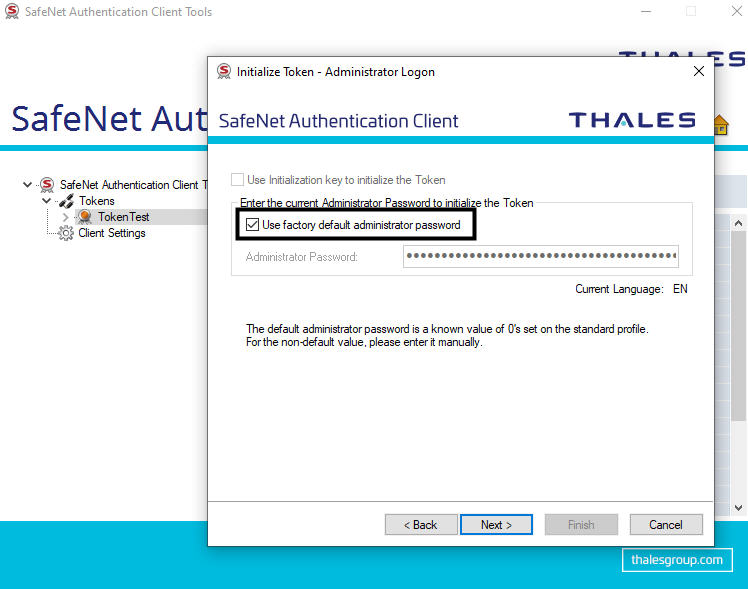
- Select Use factory default administrator password and click Next >
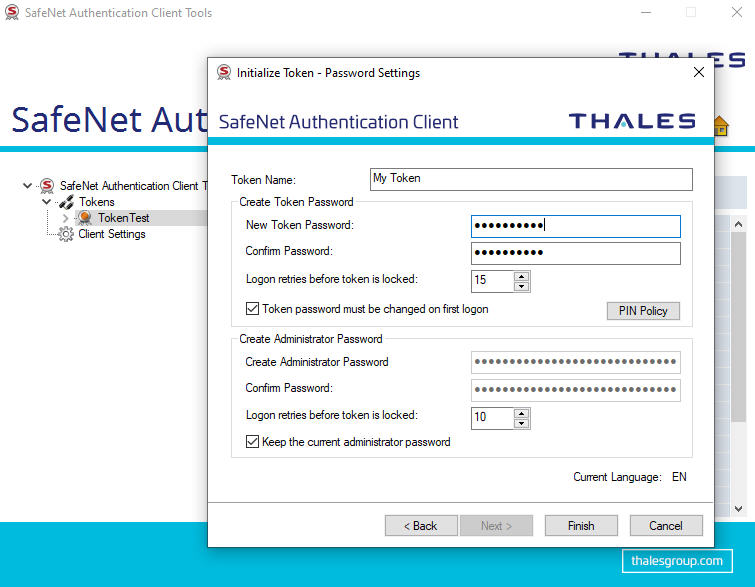
- Complete the Password Settings Page and click Finish.
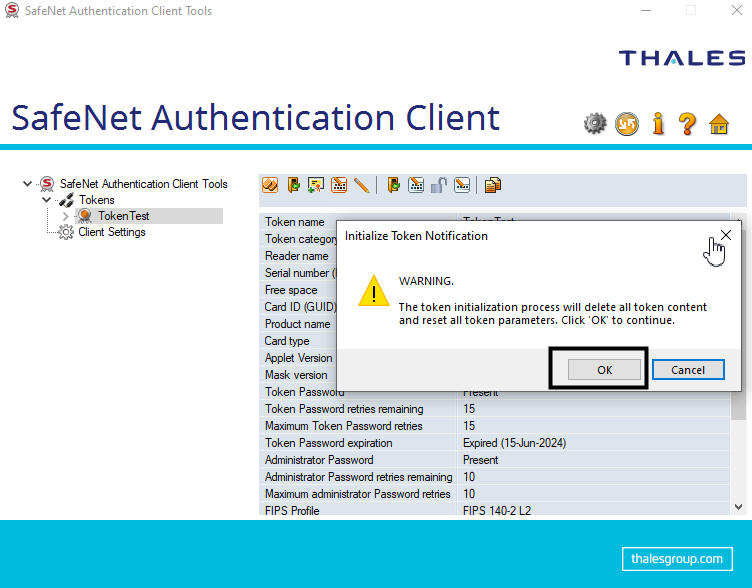
- A Warning message will pop up, read it and click OK.
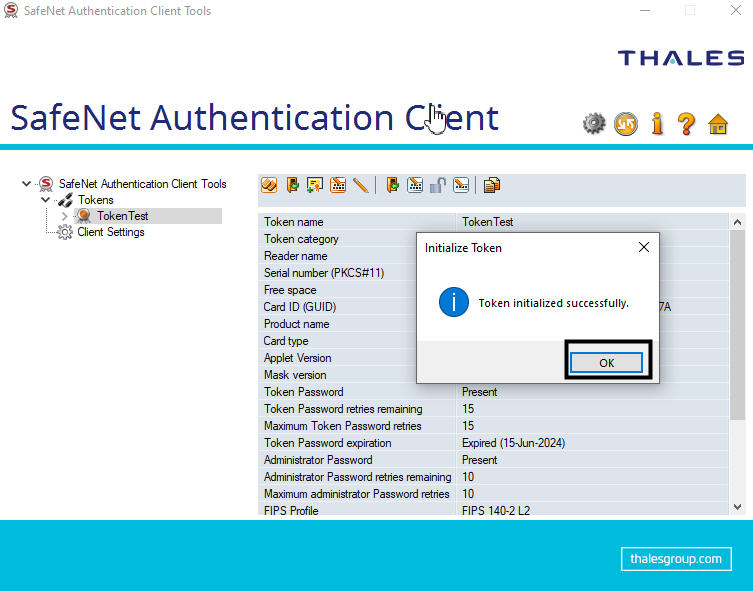
- Initialization successful. Click OK.
Step two: Download and install DigiCert Trust Assistant
- Download the DigiCert Trust Assistant. You will find the download link in your CertCentral account on the certificate page.
- Once you have downloaded the DigiCert Trust Assistant, double click on the file.
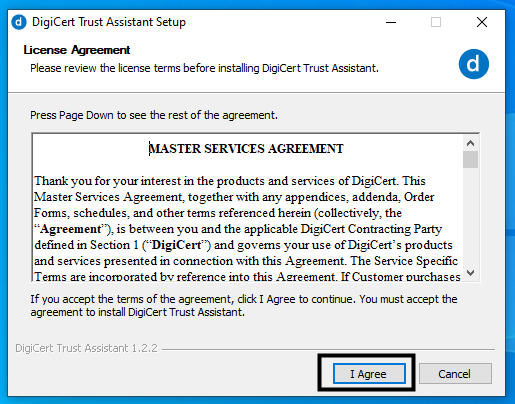
- Click on I Agree.
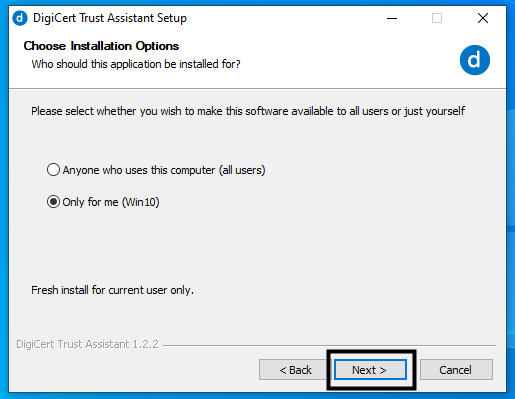
- Choose Who should this application be installed for and click Next >
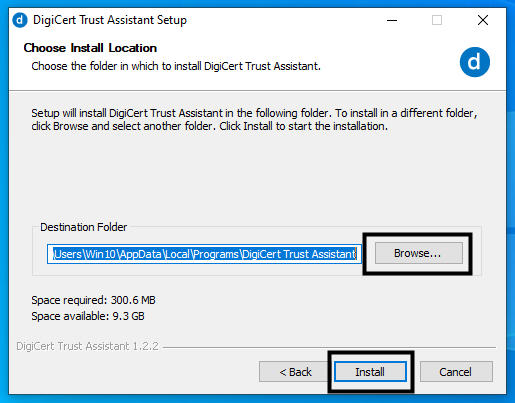
- Browse to where you'd like to store the DigiCert Trust Assistant and click Install.
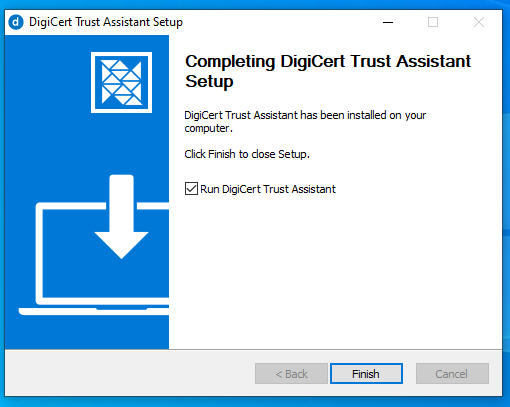
- You have successfully installed the DigiCert Trust Assistant. Click Finish.
Step Three: Install your certificate on your DigiCert provided hardware token
Return to your Cert Central account and navigate to your certificate’s order page. Click on Install the certificate and follow the instructions.
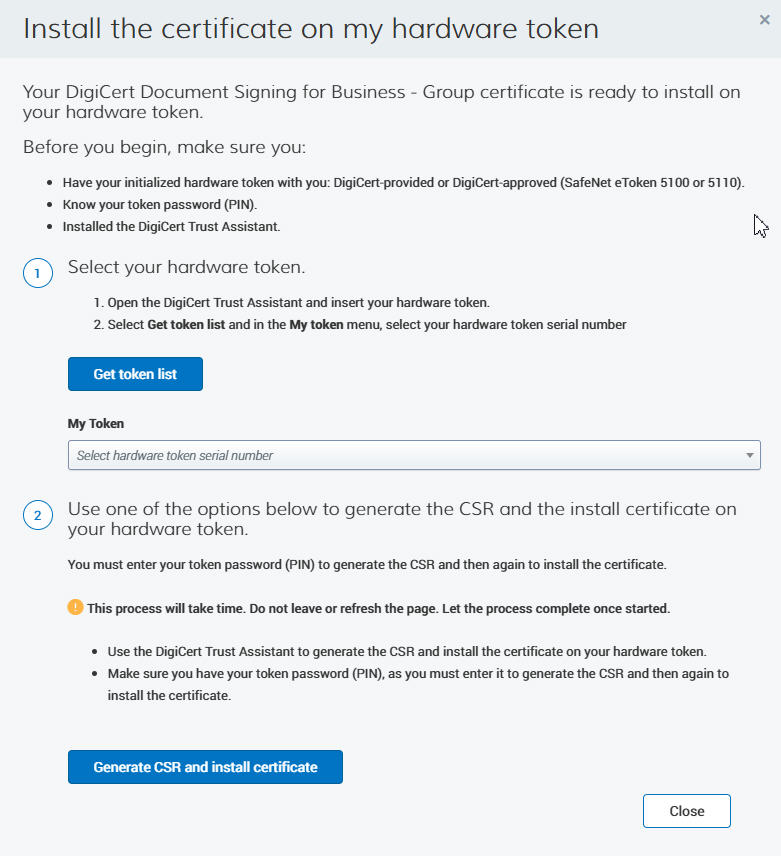
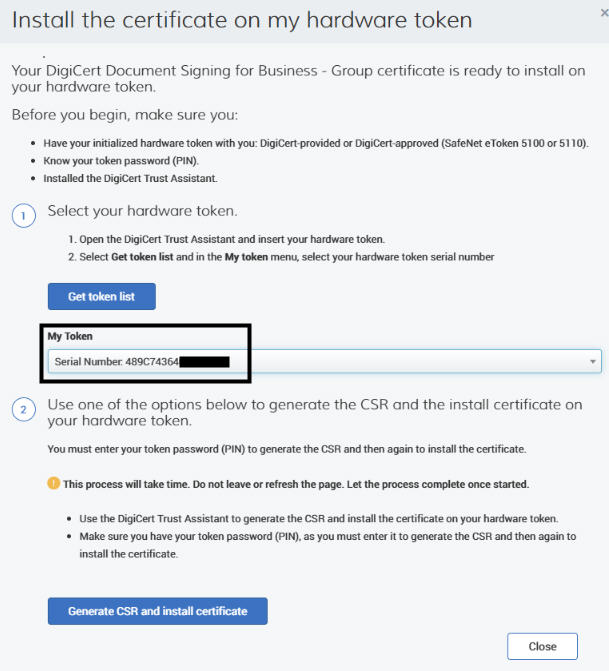
- Ensure that your token is plugged, and the DigiCert Trust Assistant is open.
- In CertCentral, on the order page click on Get Token list and choose your token by clicking on the serial number. Click on Generate CSR and Install certificate.
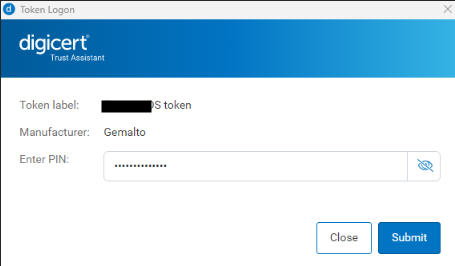
- A Digital Trust Assistant window will pop up asking you to provide the token password.
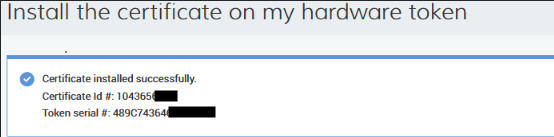
- A pop-up box will appear on the installation window stating that the certificate has been successfully installed.
Password 101
The SafeNet eToken uses the following passwords:
- Administrator Password:
The default Administrator Password is "0" 48 times as provided by the manufacturer. If "this" password is lost, you are permanently locked out of the eToken and must purchase a new one. DigiCert does not set up this password. - Token Password:
This password is used to access the eToken certificate store. If lost, you can reset the eToken and reinstall the certificate. - Personal Unlocking Key (PUK): Default PUK is 000000.
DigiCert does not use the PUK in our process.
Minimum Password Requirements:
- Your password should contain at least 8 characters.
- Your password should include both upper-case characters and lower-case characters as well as numerals and special characters (for example: !, $, %, #).
- The minimum password length and character requirements apply to both the Token password and the Administrator password.
Sign Documents
You're done! You can begin using your DigiCert Document Signing Certificate to sign documents.
For instructions on how sign documents with your document signing certificate, see the topics below.
Sign OpenOffice and LibreOffice documents
For instructions on how to set up your token and to install and rekey your document signing certificate, scroll to the end of our TLS/SSL, code signing, document signing certificates' support page.
-

The most-trusted global provider of high-assurance TLS/SSL, PKI, IoT and signing solutions.
-
-


-
© 2022-2025, DigiCert, Inc. All rights reserved.
Cookie Settings
