- Contact Us
-

choose your language
-

Knowledge Base
SonicWALL NSA | CSR Creation to SSL Certificate Installation
SonicWALL Network Security Appliance | Using the DigiCert® Certificate Utility for Windows
If you already have an SSL Certificate with private key from a PKCS#12 (.p12 or .pfx) encoded file, and you just need to install it, see the SonicWALL (NSA): How to Install Your SSL Certificate .pfx file section of this page.
If you prefer to use SonicOS to create your Certificate Signing Request, see Create a CSR on a SonicWALL Network Security Appliance (NSA).
Use the DigiCert Certificate Utility to complete the following steps in the SSL Certificate process:
Because SonicWALL appliances support SSL certificates with private key PFX-encoded files, if you have a Microsoft server or workstation, you can use the DigiCert® Certificate Utility for Windows to generate your CSR and more.
Generate a CSR.
Use the Certificate Utility to create your CSR. See CSR Creation Instructions for Microsoft Servers.
Import your SSL Certificate (intermediate and root certificates included).
Use the utility to import the SSL (End-Entity), Intermediate, and Root (Trust Anchors) Certificates to your Microsoft server or workstation. See SSL Certificate Importing Instructions: DigiCert® Certificate Utility for Windows.
Export your SSL Certificate (intermediate and root certificates included) as a .pfx file.
Use the utility to export the SSL (End-Entity), Intermediate, and Root (Trust Anchors) Certificates as a .pfx file so that you can install the certificates on your SonicWALL appliance. See DigiCert SSL Cert Util SSL Import/Export Instructions.
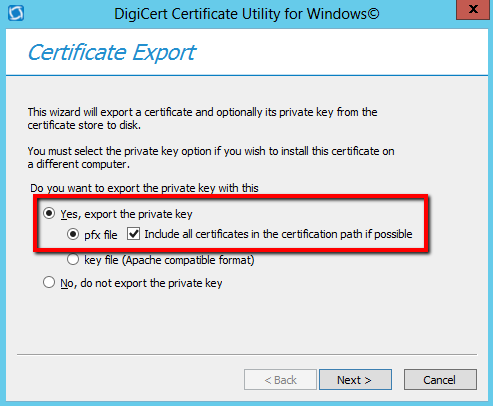
Note: During the DigiCert SSL Certificate exporting process, make sure that you select Yes, export the private key and pfx file. Then, check Include all certificates in the certification path if possible. This option ensures that you export all the required certificates for SonicWALL SSL Certificate Installation: Root (Trust Anchors), Intermediate, and SSL (End-Entity) Certificates as one .pfx file.
After you export your SSL (End-Entity), Intermediate, and Root (Trust Anchors) Certificates as a .pfx file, you can use the SonicWALL OS to install the SSL Certificate .pfx file on your SonicWALL appliance.
SonicWALL NSA | How to Install Your SSL Certificate .pfx File
Log in to the SonicWALL appliance portal.
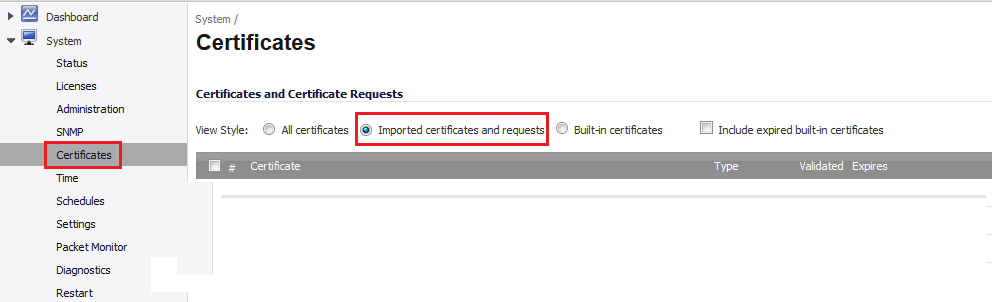
In the portal, expand System and click Certificates.
Next, click Import.

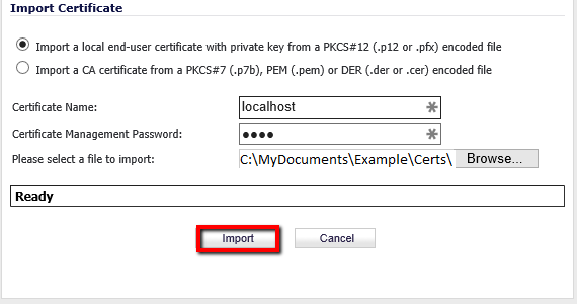
In the Import Certificate window, click Import a local end-user certificate with private key from a PKCS#12 (.p12 or .pfx) encoded file.
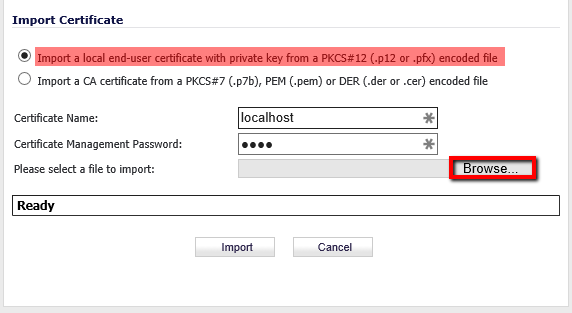
Next, enter the Certificate Name and the Certificate Management Password (the password that you created when you exported the SSL Certificate as a .pfx file).
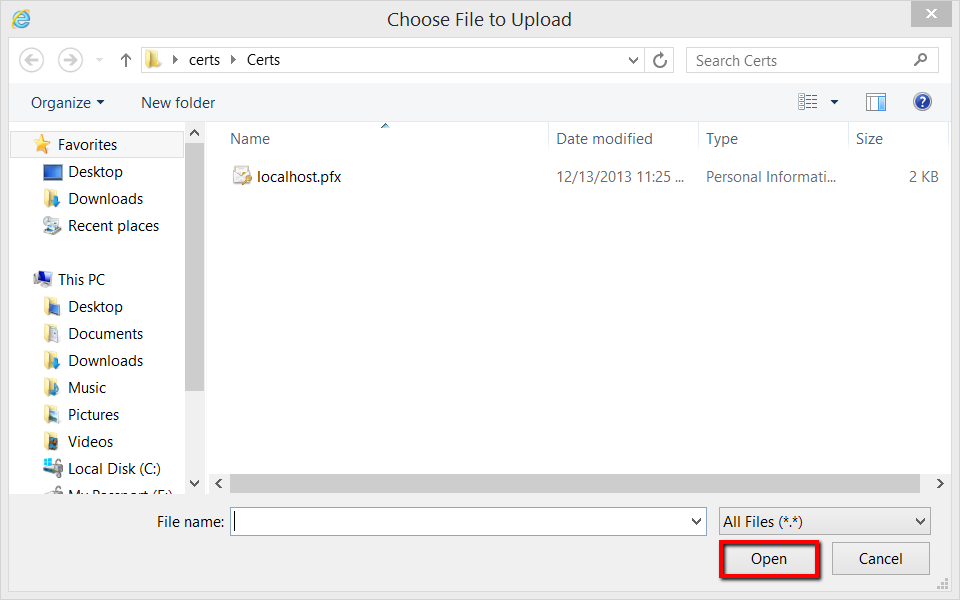
Next, click Browse to locate and open your DigiCert SSL Certificate .pfx file.
In the Import Certificate window, click Import.
After the certificate is imported, it appears in the list of certificates on the Certificates page.
Your SSL Certificate can now be enabled across your SonicWALL appliance.
-

The most-trusted global provider of high-assurance TLS/SSL, PKI, IoT and signing solutions.
-
-


-
© 2022-2025, DigiCert, Inc. All rights reserved.
Cookie Settings
