Use the DigiCert Management Tool to Export and Import SSL Certificates from a Microsoft Server Type to another Microsoft Server Type
You can use the .PFX file as a backup, or you can import it to another server. Use these instructions to export an installed SSL certificate and its corresponding private key as a .PFX file from a Microsoft server type and import the .PFX file to another Microsoft server type (IIS, Exchange, Office Communications Server, ISA, or TMG) or another server or device that accepts a .PFX file.
You can also export a Windows SSL certificate from a Windows server to an Apache server.
See Export a Windows SSL Certificate to an Apache Server.
Exporting a Certificate from a Microsoft Server Platform
-
Download and run the DigiCert Certificate Management Tool on the Microsoft server.
-
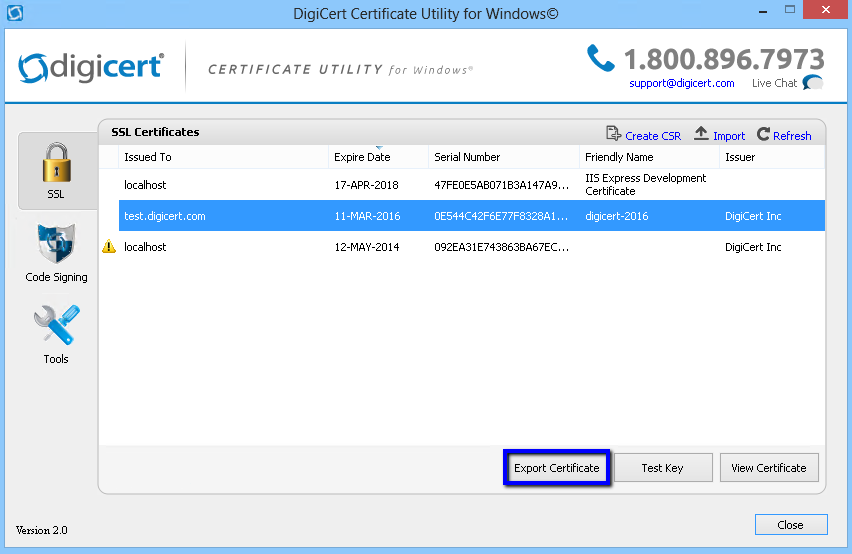
In DigiCert Certificate Utility for Windows©, click SSL (lock icon), select the certificate that you want to export to a .PFX file, and then, click Export.
-
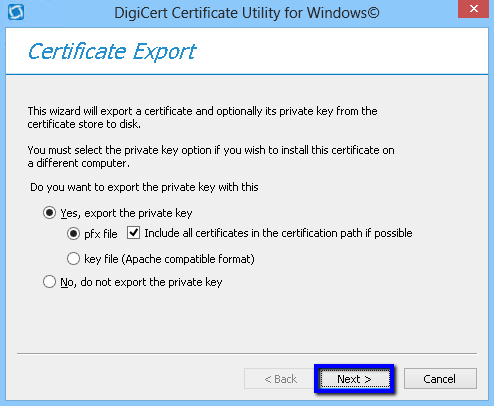
In the Certificate Export wizard, select Yes, export the private key, select pfx file, check Include all certificates in the certification path if possible, and then, click Next.
-
In the Password and Confirm Password boxes, enter and confirm your new password, and then, click Next.
Note: You must use this password to import the certificate onto other Windows type servers or other servers or devices that accept a .PFX file.

-
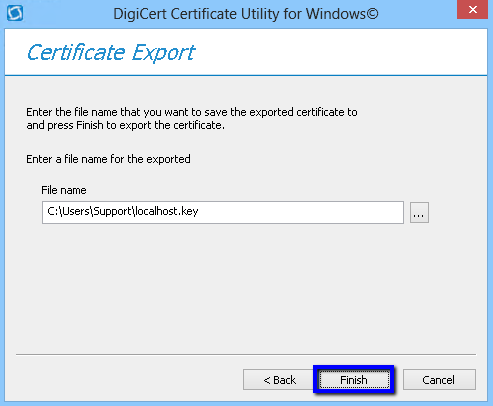
In the File name box, enter or click … to browse for the location and file name where you want to save the .PFX file or .PFX and private key files, and then, click Finish.
Importing a Certificate to a Microsoft Server Platform
-
Download and run the DigiCert Certificate Management Tool on the Microsoft server.
-
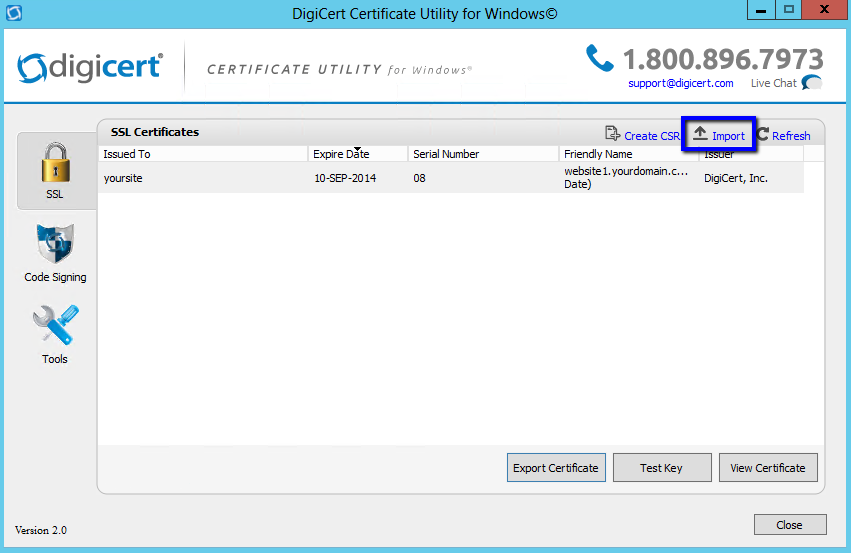
In DigiCert Certificate Utility for Windows©, click SSL (lock icon), and then, click Import.
-
In the Certificate Import wizard, in the File Name box, enter or click Browse to browse for the .PFX file that you want to install on this server, and then, click Next.

-
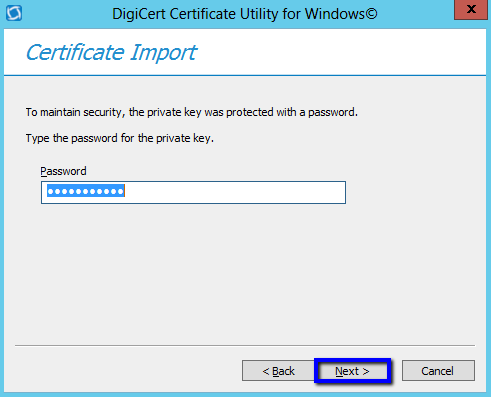
In the Password box, enter the password that was used to create and export the .PFX file, and then, click Next.
-
In the Enter a new friendly name… box, enter a friendly name for the certificate that you will use to refer to the certificate in IIS and Exchange.
We recommend that you add DigiCert and the expiration date to the end of your friendly name, for example, localhost-DigiCert-(Expiration date).
This information helps identify the issuer and expiration date for each certificate. It also helps distinguish multiple certificates with the same domain name.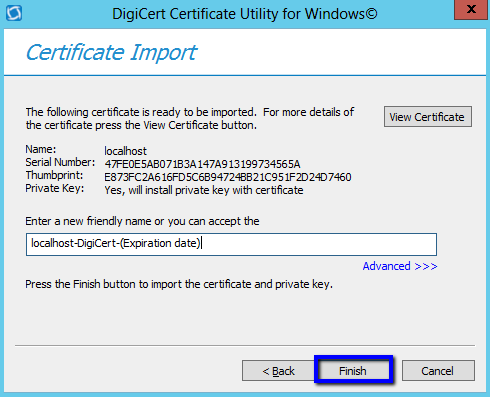
-
Click Finish.
-
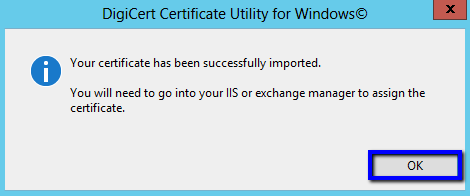
In the DigiCert Certificate Utility for Windows© confirmation window, read the message that the certificate has been successfully imported, and then, click OK.
-
After the certificate has been imported, do one of the following:
In IIS, bind the certificate to a website. If you need instructions to bind a certificate to a website, see the SSL certificate installation instructions for your version of Microsoft IIS. The installation instruction contains steps for binding a certificate to a website. In Exchange manager, assign the certificate to services in Exchange. If you need instructions to assign a certificate to services in Exchange, see the SSL certificate installation instructions for your version of Microsoft Exchange Server. The installation instruction contains steps for assigning a certificate to services in Exchange. On the SSL Certificate Installation Instructions & Tutorials page, under Common Platforms & Operating Systems, in the Microsoft Internet Information Services section or the Microsoft Exchange Server section, click the link for your version of IIS or Exchange.