![]()
These instructions are for Microsoft Active Directory Federation Services 2.0 on a Windows Server 2012/2012 R2.
Because Microsoft Active Directory Federation Services (AD FS) doesn’t include an easy GUI for creating a certificate signing request (CSR) and installing your SSL Certificate, we recommend that you use the DigiCert® Certificate Utility for Windows to create your CSR, install your SSL Certificate in to the Personal Store, and then export it as a .pfx. For more information about this tool, see DigiCert® Certificate Utility for Windows.
Next, use Microsoft Management Console (MMVC) to import the SSL Certificate .pfx file in to the AD FS Personal Store. Finally, use the AD FS Management Console to assign the SSL Certificate to the AD FS service.
Use the instructions on this page to create your certificate signing request (CSR) and then to install your SSL Certificate.
-
To create your CSR, see Microsoft AD FS: Using the DigiCert Certificate Utility to Create Your CSR (Certificate Signing Request).
-
To install your SSL Certificate, see Microsoft AD FS: Using the DigiCert Certificate Utility, MMC, and AD FS to Install Your SSL Certificate.
If you prefer not to use the DigiCert Utility or for some reason cannot use the utility, see Microsoft AD FS: Create CSR and Install SSL Certificate (IIS 8).
1. Microsoft AD FS: Using the DigiCert Certificate Utility to Create Your CSR (Certificate Signing Request)
Because Microsoft Active Directory Federation Services (AD FS) doesn't include an easy GUI method to create a CSR, we recommend that you use the DigiCert® Certificate Utility for Windows to create your CSR.
AD FS: How to Create a CSR Using the DigiCert Certificate Utility
These instructions are for Microsoft Active Directory Federation Services 2.0 on a Windows Server 2012/2012 R2.
-
On your Windows 2012/2012R2 AD FS server, download and save the DigiCert® Certificate Utility for Windows executable (DigiCertUtil.exe).
-
Run the DigiCert® Certificate Utility for Windows.
Double-click DigiCertUtil.
-
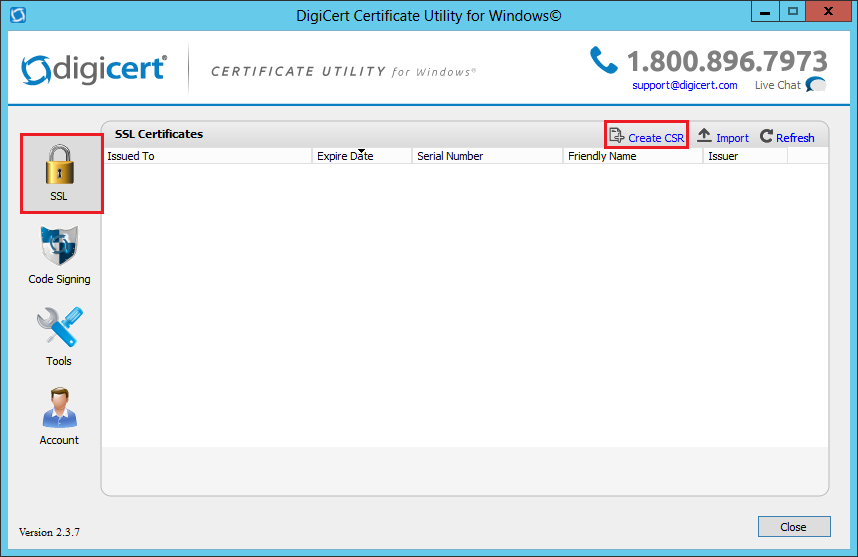
In the DigiCert Certificate Utility for Windows©, click SSL (gold lock), and then, click Create CSR.
-
On the Create CSR page, enter the following information:
Certificate Type: Select SSL. Common Name: Enter the name to be used to access the certificate. Make sure that the common name matches the name that clients will use to access the AD FS protected website. Subject Alternative Names: If you are requesting a Multi-Domain (SAN) Certificate, enter any SANs that you want to include. (i.e. www.example.com, www.example2.com, and www.example3.net) Organization: Enter your company’s legally registered name (i.e. YourCompany, Inc.). Department: (Optional) Enter the department within your organization that you want to appear on the SSL Certificate. City: Enter the city where your company is legally located. State: In the drop-down list, select the state where your company is legally located. If your company is located outside the USA, you can enter the applicable name in the box. Country: In the drop-down list, select the country where your company is legally located. Key Size: In the drop-down list, select 2048. Provider: In the drop-down list, select Microsoft RSA SChannel Cryptographic Provider, unless you have a specific cryptographic provider. 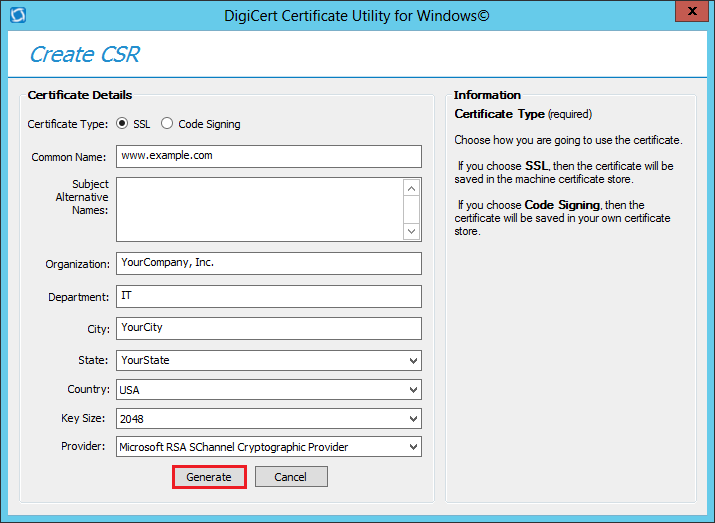
-
Click Generate.
-
On DigiCert Certificate Utility for Windows® - Create CSR page, do one of the following, and then, click Close:
Click Copy CSR. Copies the certificate contents to the clipboard. If you use this option, we recommend that you paste the CSR into a tool such as Notepad. If you forget and copy some other item, you still have access to the CSR, and you do not have to go back and recreate it. Click Save to File. Saves the CSR as a .txt file to the Windows server or workstation. We recommend that you use this option. 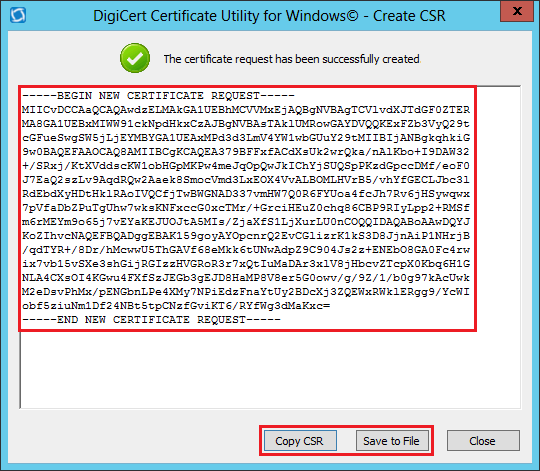
-
Use a text editor to open the file. Then, copy the text, including the -----BEGIN NEW CERTIFICATE REQUEST----- and -----END NEW CERTIFICATE REQUEST----- tags, and paste it in to the DigiCert order form.
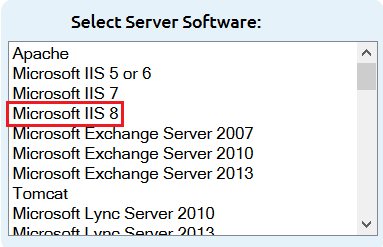
Note: During your DigiCert SSL Certificate ordering process, make sure that you select Microsoft IIS 8 when asked to Select Server Software. This option ensures that you receive all the required certificates for Microsoft Active Directory Federation Services SSL Certificate installation (Intermediate and SSL Certificates).
-
After you receive your SSL Certificate from DigiCert, you can install it.
![]()
2. Microsoft AD FS: Using the DigiCert Certificate Utility, MMC, and AD FS to Install Your SSL Certificate
If you have not yet created a Certificate Signing Request (CSR) and ordered your certificate, see Microsoft AD FS: Using the DigiCert Certificate Utility to Create Your CSR (Certificate Signing Request).
These instructions are for Microsoft Active Directory Federation Services 2.0 on a Windows Server 2012/2012 R2.
Microsoft AD FS: How to Install Your SSL Certificate
The installation process consists of the following steps:
-
Use the DigiCert® Certificate Utility for Windows to import your SSL Certificate to your AD FS server.
Using the DigiCert Certificate Utility to Import the SSL Certificate to Your AD FS Server.
-
Use the DigiCert® Certificate Utility for Windows to export the certificate as a .pfx file.
Using the DigiCert Certificate Utility to Export the SSL Certificate as a .pfx File
-
Use the MMC to import the SSL Certificate .pfx file in to the AD FS Personal Store.
Using the MMC to Import the SSL Certificate .pfx File in to the AD FS Personal Store.
-
Use the AD FS Console to assign the SSL Certificate to the AD FS service.
Using the AD FS Console to Assign the SSL Certificate to the AD FS Service
-
Use PowerShell to tell AD FS service to use the SSL Certificate.
i. Using the DigiCert Certificate Utility to Import the SSL Certificate to Your AD FS Server
After we validate and issue your SSL Certificate, you can use the DigiCert® Certificate Utility for Windows to import the file to your Microsoft Active Directory Federation Services server.
-
On your Windows 2012/2012R2 AD FS server where you created the CSR, open the ZIP file containing your SSL Certificate and save the SSL Certificate file (i.e. your_domain_name.cer).
-
Run the DigiCert® Certificate Utility for Windows.
Double-click DigiCertUtil.
-
In the DigiCert Certificate Utility for Windows©, click SSL (gold lock), and then, click Import.

-
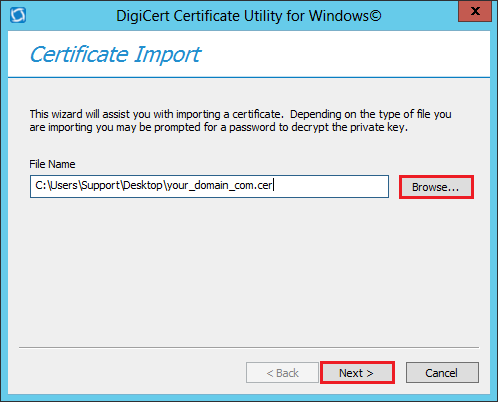
In the Certificate Import wizard, click Browse to browse to the .cer (i.e. your_domain_com.cer) certificate file that DigiCert sent you, select the file, click Open, and then, click Next.
-
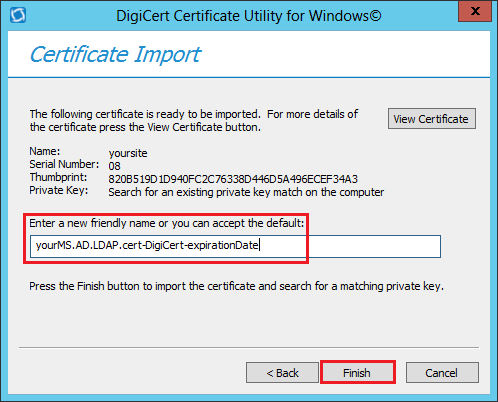
In the Enter a new friendly name or you can accept the default box, enter a friendly name for the certificate. The friendly name is not part of the certificate; instead, it is used to identify the certificate.
We recommend that you add DigiCert and the expiration date to the end of your friendly name, for example: yoursite-DigiCert-expirationDate. This information helps identify the issuer and expiration date for each certificate. It also helps distinguish multiple certificates with the same domain name.
-
To import the SSL Certificate to your server, click Finish.
Now that you have successfully imported the SSL Certificate to the server, use the DigiCert Certificate Utility to export the certificate as a .pfx file.
ii. Using the DigiCert Certificate Utility to Export the SSL Certificate as a .pfx File
-
Run the DigiCert® Certificate Utility for Windows.
Double-click DigiCertUtil.
-
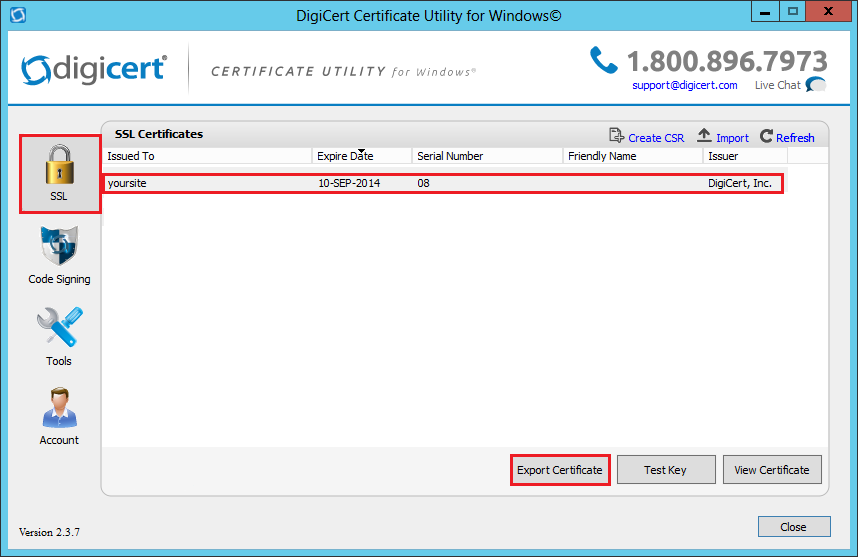
In the DigiCert Certificate Utility for Windows©, click SSL (gold lock), select the SSL Certificate that you want to export, and then, click Export Certificate.
-
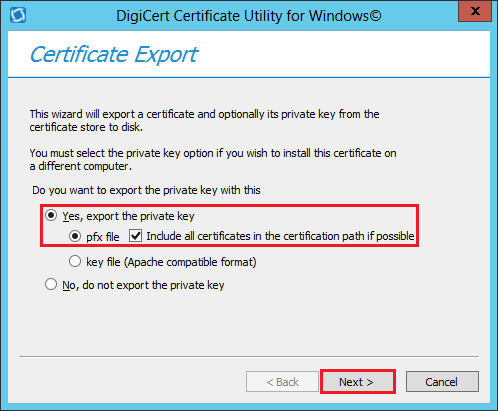
In the Certificate Export wizard, select Yes, export the private key, select pfx file, check Include all certificates in the certification path if possible, and then, click Next.
-
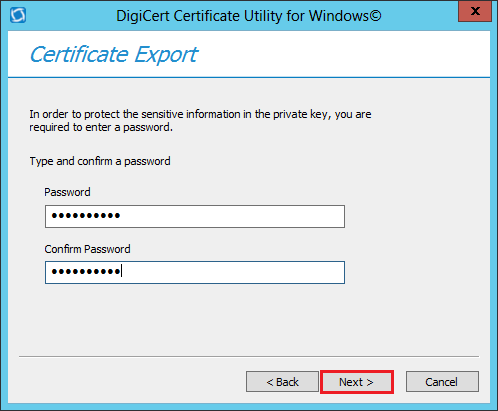
In the Password and Confirm Password boxes, enter and confirm your password, and then, click Next.
Note: This password is used when you import the SSL Certificate onto other Windows type servers or other servers or devices that accept a .pfx file.
-
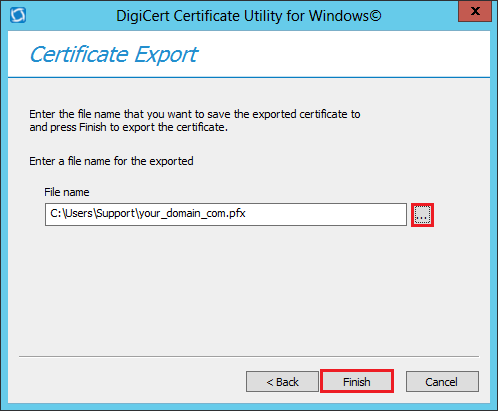
In the File name box, click … to browse for and select the location and file name where you want to save the .pfx file, and then, click Finish.
-
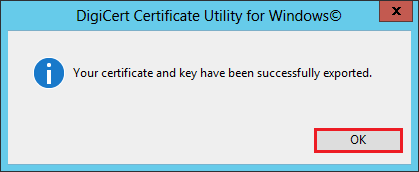
After you receive the "Your certificate and key have been successfully exported" message, click OK.
Now that you have successfully exported the SSL Certificate as a .pfx file, use the Microsoft Management Console (MMC) to import the SSL Certificate in to AD FS Personal Store.
iii. Using the MMC to Import the SSL Certificate .pfx File in to the AD FS Personal Store
-
On your Windows 2012/2012R2 AD FS server,open the Microsoft Management Console (MMC) as an admin.
-
From the Windows Start screen, type mmc.exe.
-
Right-click on mmc.exe.
-
In the menu at the bottom of the screen, click Run as administrator.
-
-
In the User Account Control window, click Yes to allow the program to make changes to the computer.
-
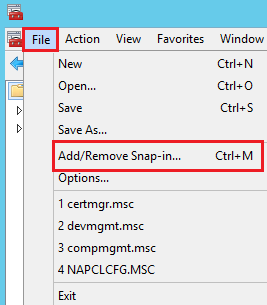
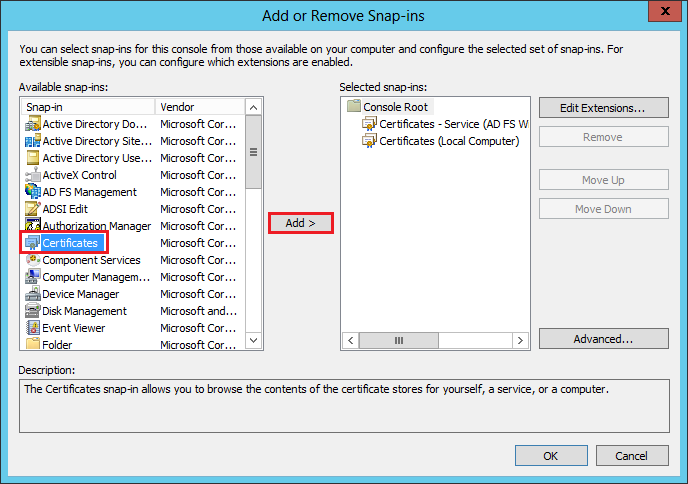
In the MMC Console, in the menu at the top, click File > Add/Remove Snap-in.
-
In the Add or Remove Snap-ins window, under Available snap-ins (left side), click Certificates and then, click Add.
-
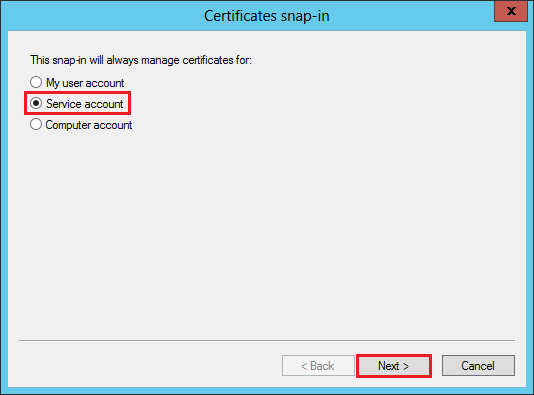
In the Certificates snap-in window, select Service account and then, click Next.
-
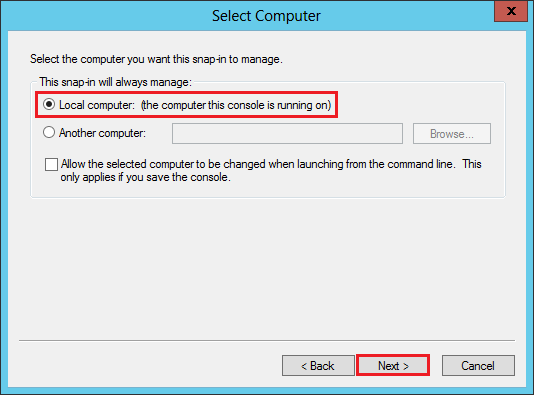
In the Select Computer window, select Local computer: (computer this console is running on), and then, click Next.
-
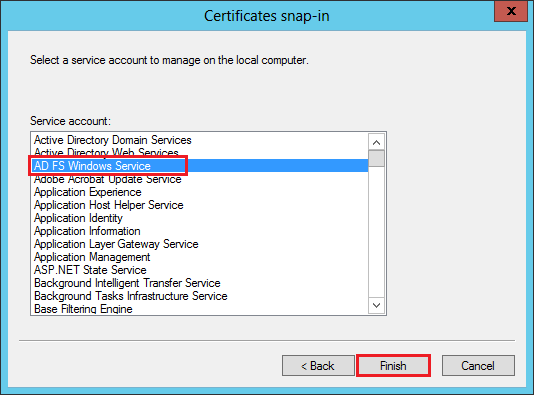
In the Certificate snap-in window, select AD FS Windows Service and then, click Finish.
-
In the Add or Remove Snap-ins window, click OK.
-
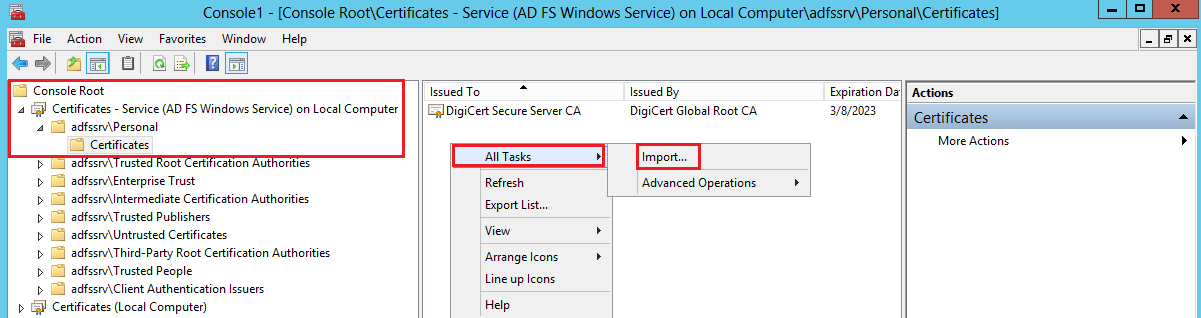
In the MMC Console, in the console tree, expand Certificates - Service (AD FS Windows Service) > Personal, and then, click Certificates.
-
Right-click on the center section and then click All Tasks > Import to open the Certificate Import Wizard.
-
In the Certificate Import Wizard, on the Welcome to the Certificate Import Wizard page, click Next.
-
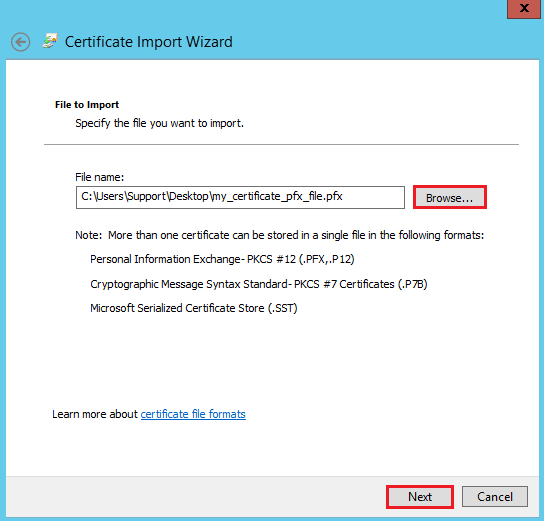
On the File to Import page, click Browse to browse to the SSL Certificate .pfx file that you exported earlier, select the file, and then, click Open.
-
On the File to Import page, click Next.
-
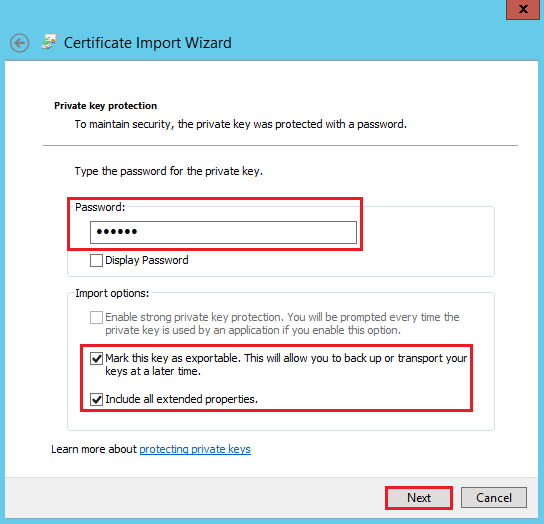
On the Private key protection page, do the following thing and then, click Next:
- In the Password box, enter the password you created to export your SSL Certificate as a .pfx file.
- Check Mark this key as exportable.
- Check Include all extended properties.
-
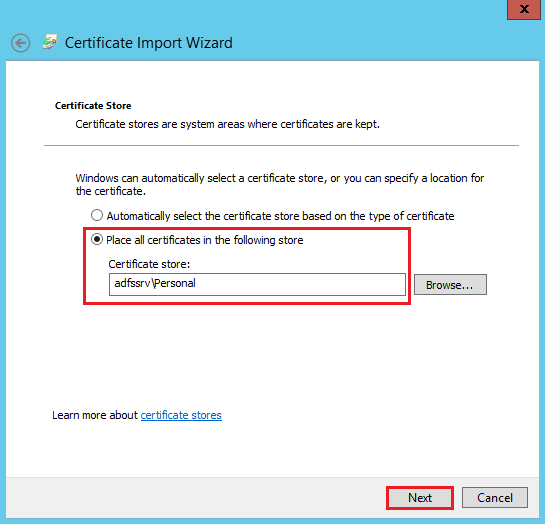
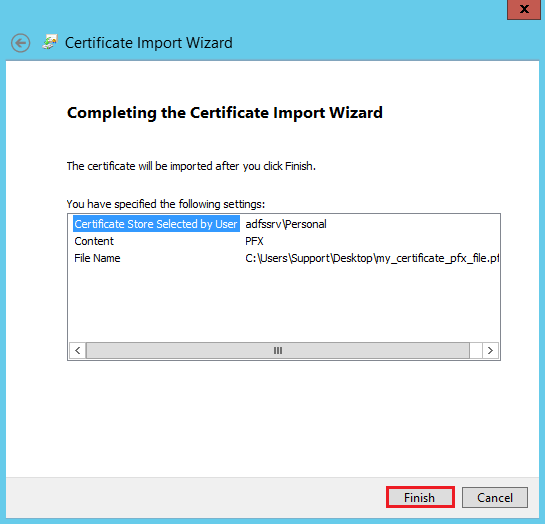
On the Certificate Store page, make sure that Place all certificates in the following store is selected and the Certificate store box is populated with the Personal store, and then, click Next:
-
On the Completing the Certificate Import Wizard page, verify that the settings are correct and then, click Finish.
-
You should receive "The import was successful" message.
Now that you have successfully imported the SSL Certificate .pfx file into AD FS Personal Store, use the AD FS management console to assign the SSL Certificate to the AD FS service.
iv. Using the AD FS Management Console to Assign the SSL Certificate to the AD FS Service
-
On your Windows 2012/2012R2 AD FS server,open the AD FS management console as an admin.
-
From the Windows Start screen, type ad fs management.
-
Right-click on AD FS Management.
-
In the menu at the bottom of the screen, click Run as administrator.
-
-
In the User Account Control window, click Yes to allow the program to make changes to the computer.
-
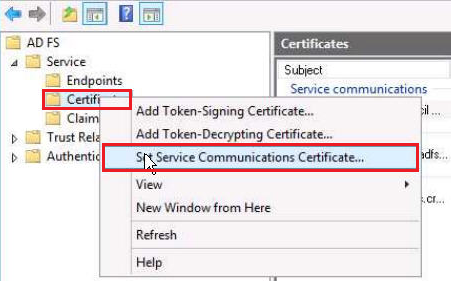
In the AD FS Console window, in the console tree, expand Services, right-click on the Certificates folder, and select Set Service Communications Certificate.
-
Now, in the Windows Security window, select the new SSL Certificate that you just imported in to the AD FS Personal Store in the previous section and then, click OK.
-
In the AD FS Management window, a private key warning reminds you that the selected certificate’s private key must be accessible.
This is a reminder that you need to ensure that the private key was correctly associated with your SSL Certificate during the installation process.
-
Click OK.
Your SSL Certificate should be successfully assigned to the AD FS Service.
v. Using PowerShell to Enable Your SSL Certificate
If you are renewing a certificate, or if you have more than one certificate in the AD FS Personal Store, you need tell the AD FS service which certificate to use. If you don’t, AD FS service may pick the wrong or expired certificate.
-
On your Windows 2012/2012R2 AD FS server, run the DigiCert® Certificate Utility for Windows.
Double-click DigiCertUtil.
-
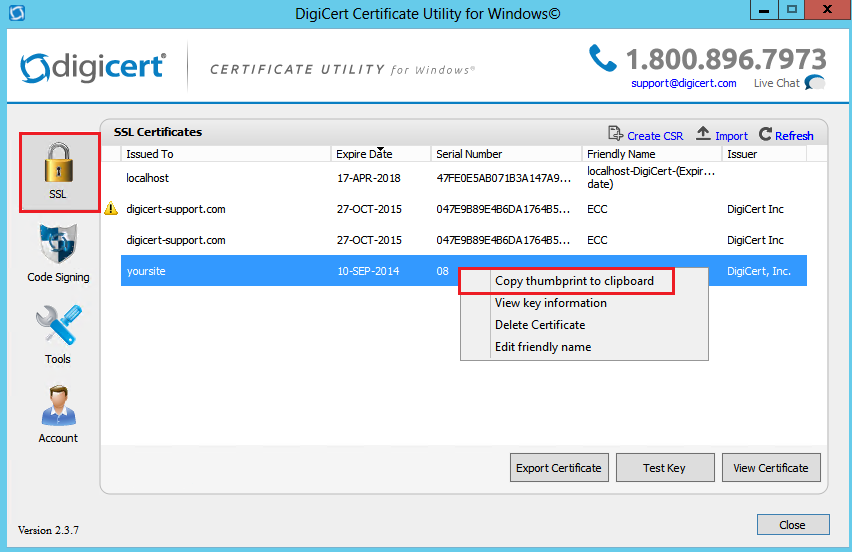
In the DigiCert Certificate Utility for Windows©, click SSL (gold lock), right-click on the SSL Certificate that you that you just assigned to the AD FS Service in the previous section, and then click Copy thumbprint to clipboard.
-
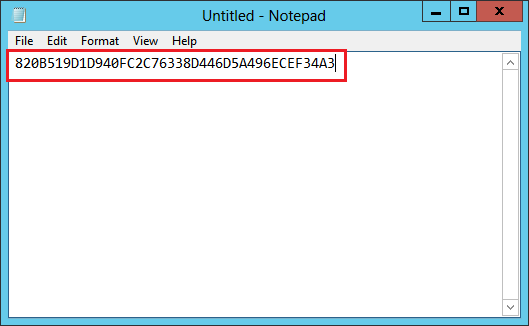
In a text editor, such as Notepad, paste the thumbprint.
-
On your AD FS server, open Windows PowerShell as an admin.
-
From the Windows Start screen, type Windows PowerShell.
-
Right-click on Windows PowerShell.
-
In the menu at the bottom of the screen, click Run as administrator.
-
In the User Account Control window, click Yes to allow the program to make changes to the computer.
-
-
In the Administrator: Windows PowerShell window, run the following command:
Set-AdfsSslCertificate –Thumbprint xxxxthumbprintofthenewsslcertxxxxx -
Restart the AD FS Service.
-
To confirm that the certificate is enabled, in PowerShell (run as administrator), run the following command:
Get-AdfsSslCertificate –Thumbprint xxxxthumbprintofthenewsslcertxxxxx -
Your SSL Certificate should now be enabled.
Test Your Installation
If your website is publicly accessible, our DigiCert® SSL Installation Diagnostics Tool can help you diagnose common problems.