Create a CSR & install your SSL certificate using the DigiCert® Certificate Utility for Windows
![]()
These instructions assume that you already own your IBM Bluemix account, and that you have configured the custom domain for your application. For more information, visit IBM Cloud Bluemix. If you need instructions for IBM Watson IoT Platform, see IBM Watson IoT Platform: Create CSR & Install Messaging Server SSL Certificate for Your Watson IoT Organization (DigiCert Utility).
Use the instructions on this page to create your certificate signing request (CSR) and then to install your SSL certificate.
For a simpler way to create your CSRs (Certificate Signing Requests) and install and manage your SSL certificates, we recommend that you use the DigiCert® Certificate Utility for Windows. For more information about our utility, see DigiCert® Certificate Utility for Windows.
-
To create your certificate signing request (CSR), see IBM Bluemix: Creating Your CSR with the DigiCert Utility.
-
To install your SSL certificate, see IBM Bluemix: Using the DigiCert Utility & Bluemix Console to Install Your SSL Certificate.
If you don't have access to a Microsoft server or workstation, prefer not to use the DigiCert Utility, or for some reason cannot use the utility, see IBM Bluemix: Create CSR & Install SSL Certificate (OpenSSL).
I. IBM Bluemix: Creating Your CSR with the DigiCert Utility
The DigiCert® Certificate Utility for Windows streamlines the CSR creation process enabling you to generate the CSR with just one click.
How to Create Your CSR with the DigiCert Utility
-
On your Windows machine, download and save the DigiCert® Certificate Utility for Windows executable (DigiCertUtil.exe).
-
Run the DigiCert Certificate Utility.
-
Double-click DigiCertUtil.
-
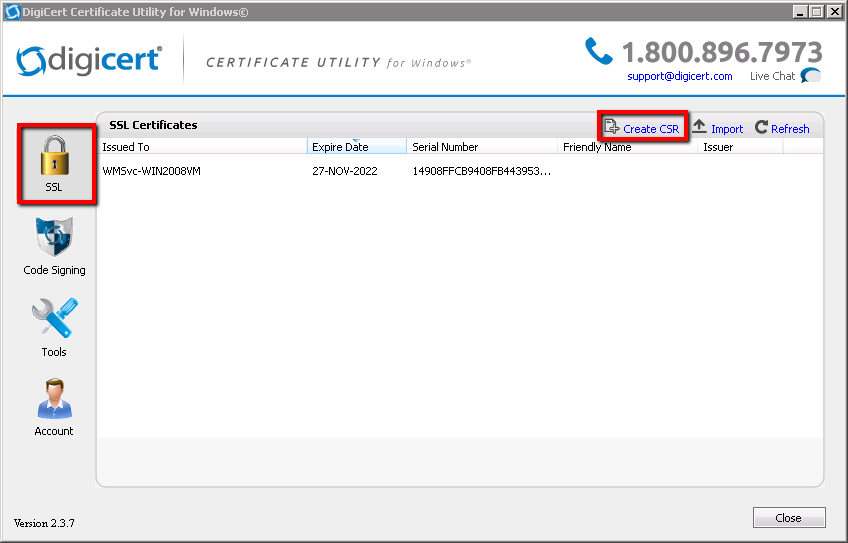
In the DigiCert Certificate Utility for Windows©, click SSL (gold lock), and then, click Create CSR.
-
On the Create CSR page, enter the following information:
Certificate Type: Select SSL. Common Name: Enter the fully qualified domain name (FQDN) (e.g., www.example.com). You may also enter the IP address. Subject Alternative Names: If you are requesting a Multi-Domain (SAN) Certificate, type any SANs that you want to include. (e.g., www.example.com, www.example2.com, and www.example3.net) Organization: Type your company's legally registered name (e.g., YourCompany, Inc.). Department: (Optional) Enter the department within your organization that you want to appear on the SSL certificate. City: Type the city where your company is legally located. State: In the drop-down list, select the state where your company is legally located. If your company is located outside the USA, you can type the applicable name in the box. Country: In the drop-down list, select the country where your company is legally located. Key Size: In the drop-down list, select 2048. Provider: In the drop-down list, select Microsoft RSA SChannel Cryptographic Provider, unless you have a specific cryptographic provider. 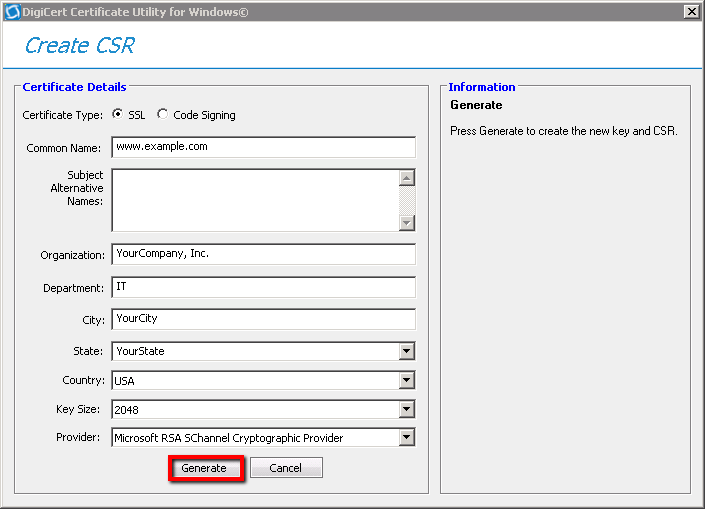
-
Click Generate.
-
On The certificate request has been successfully created page, do one of the following, and then, click Close:
Click Copy CSR. Copies the certificate contents to the clipboard. If you use this option, we recommend that you paste the CSR into a tool such as Notepad. If you forget and copy some other item, you still have access to the CSR, and you do not have to go back and recreate it. Click Save to File. Saves the CSR as a .txt file to the Windows server or workstation. We recommend that you use this option. 
-
Use a text editor (such as Notepad) to open the file. Then, copy the text, including the -----BEGIN NEW CERTIFICATE REQUEST----- and -----END NEW CERTIFICATE REQUEST----- tags, and paste it into the DigiCert order form.
-
After you receive your SSL certificate from DigiCert, you can install it.
II. IBM Bluemix: Using the DigiCert Utility & Bluemix Console to Install Your SSL Certificate
![]()
If you have not yet used the DigiCert® Certificate Utility for Windows to create a CSR and ordered your certificate, see IBM Bluemix: Creating Your CSR with the DigiCert Utility.
After receiving your SSL certificate, you need to upload it upload it to your IBM Bluemix account and configure your application to use it.
To install your IBM Bluemix SSL certificate, complete the steps below.
-
Import your SSL certificate to your Windows server using the DigiCert® Certificate Utility for Windows.
How to Import Your SSL Certificate Using the DigiCert Certificate Utility
-
Export the SSL certificate in Apache compatible format (separate .key and .crt files) using the DigiCert® Certificate Utility for Windows.
-
Upload and implement your SSL certificate using the IBM Bluemix Management Console.
i. How to Import Your SSL Certificate Using the DigiCert Certificate Utility
After we validate and issue your SSL certificate, you can use the DigiCert® Certificate Utility for Windows to import the file to your Microsoft server.
-
On the server where you created the CSR, save the SSL certificate .cer file (e.g., your_domain_com.cer) that DigiCert sent to you.
-
Run the DigiCert® Certificate Utility for Windows.
Double-click DigiCertUtil.
-
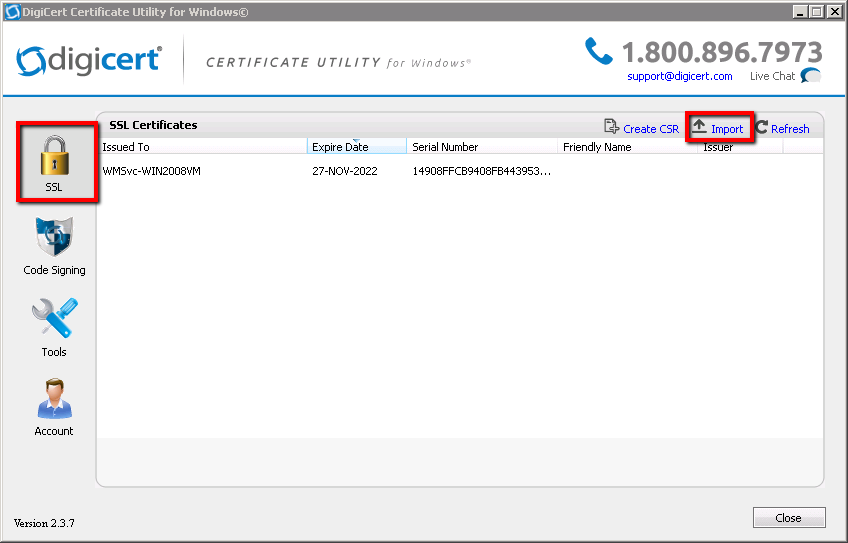
In the DigiCert Certificate Utility for Windows©, click SSL (gold lock) and then click Import.
-
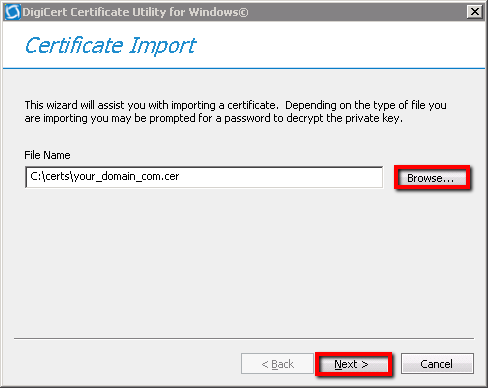
In the Certificate Import window, under File Name, click Browse to browse to the .cer (e.g., your_domain_com.cer) certificate file that DigiCert sent you, select the file, click Open, and then click Next.
-
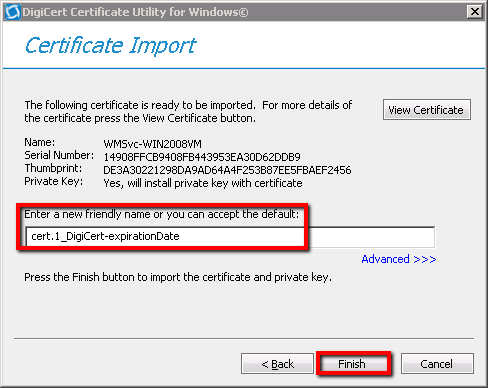
In the Enter a new friendly name or you can accept the default box, enter a friendly name for the certificate. The friendly name is not part of the certificate; instead, it is used to identify the certificate.
We recommend that you add DigiCert and the expiration date to the end of your friendly name, for example: yoursite-DigiCert-expirationDate. This information helps identify the issuer and expiration date for each certificate. It also helps distinguish multiple certificates with the same domain name.
-
To Import the SSL certificate to your server, click Finish.
You should receive a message that the certificate was successfully imported.
-
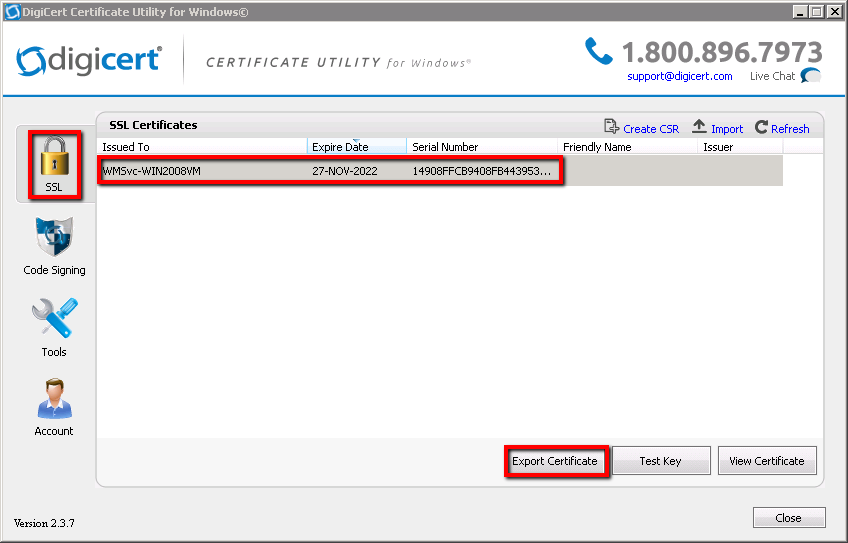
You should now see your SSL certificate in the DigiCert Certificate Utility for Windowsc©, under SSL Certificates.
ii. How to Export Your SSL Certificate Using the DigiCert Certificate Utility
To make an SSL connection, your server needs two parts, a private key file and the certificate file. Apache (and many other server types) separate these two certificate parts into separate .key file and .crt files.
-
Run the DigiCert® Certificate Utility for Windows.
Double-click DigiCertUtil.
-
In DigiCert Certificate Utility for Windows©, click SSL (gold lock), select the SSL certificate you want to export, and then click Export Certificate.
-
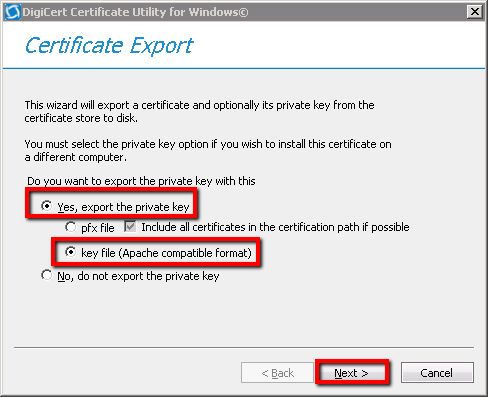
In the Certificate Export wizard, select Yes, export the private key, select key file (Apache compatible format), and then click Next.
-
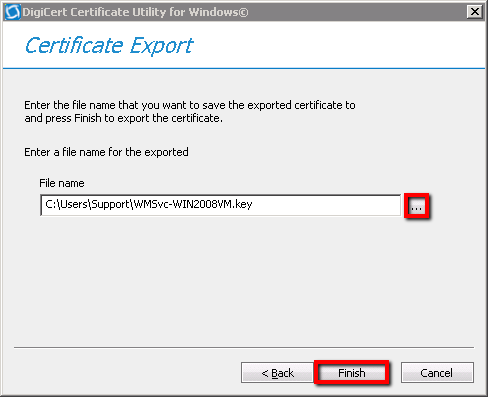
In the File name box, click … to browse for and select the location and file name where you want to save the certificate .key file, and then click Finish.
This creates the following files that you will need to upload and implement using your Bluemix Management Console.
- Private Key: your_domain_com.key
- Server Certificate: your_domain_com.crt
- Intermediate Certificate: DigiCertCA.crt
-
After you receive the "Your certificate and key have been successfully exported" message, click OK.
iii. IBM Bluemix: Installing Your SSL Certificate
Once you have the private key and certificate files, you can upload it to your IBM Bluemix account and configure your application to use it.
-
In a browser, open and log into the IBM Bluemix account.
-
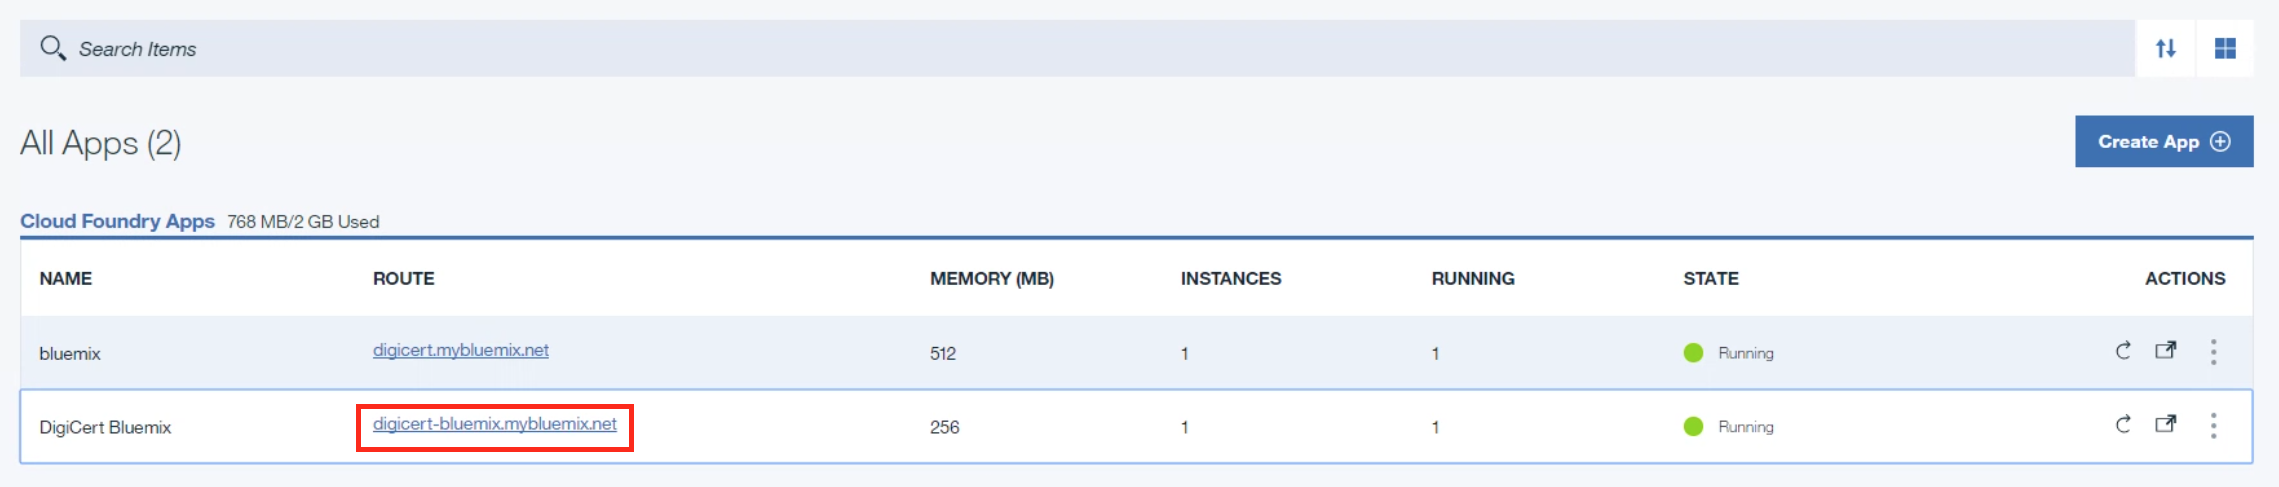
On the Dashboard select the application the SSL certificate is to secure.
-
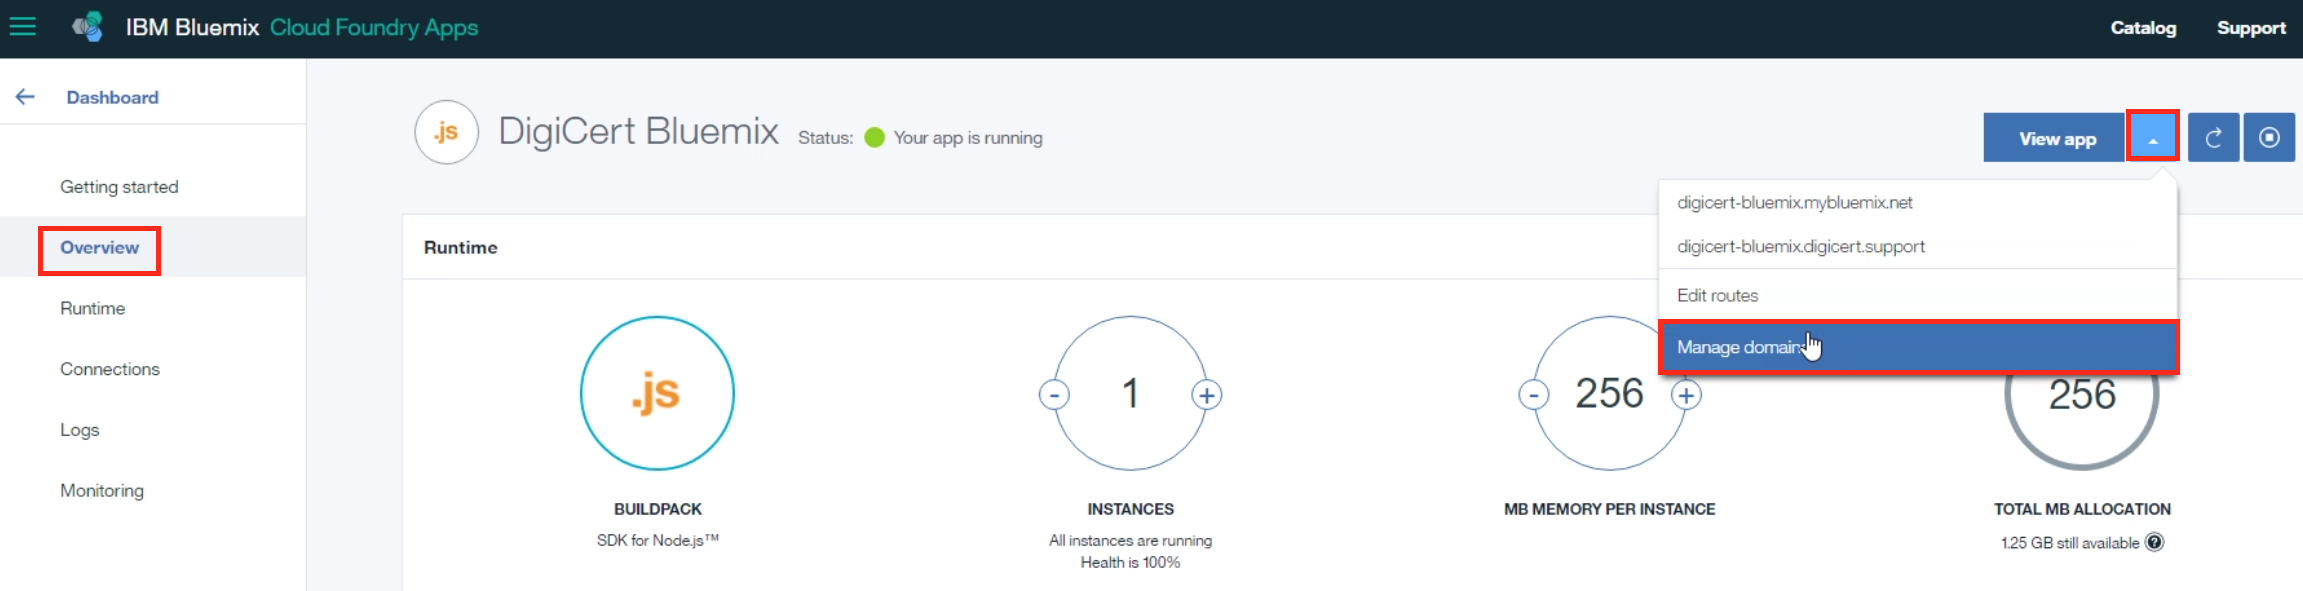
On the app Overview page, next to View app, click the down arrow and select Manage domains.
-
On the Manage Organizations page, on the Domains tab, to the right of the application in the SSL Certificate column, click the upload symbol.

-
In the Upload Certificate window, do the following:
Certificate: Click Browse. Then locate and select your server certificate .crt file (e.g., star_digicert_support.crt). Private Key: Click Browse. Then locate and select your private key .key file (e.g., star_digicert_support.key). Intermediate Certificate: Click Browse. Then locate and select the intermediate certificate .crt file (e.g., DigiCertCA.crt). 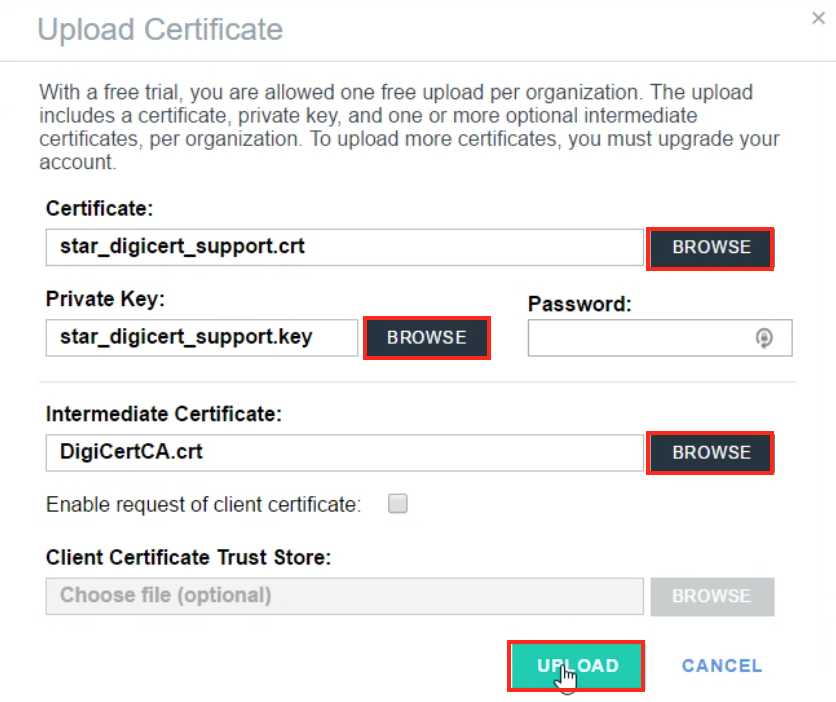
-
When you are finished, click Upload.
-
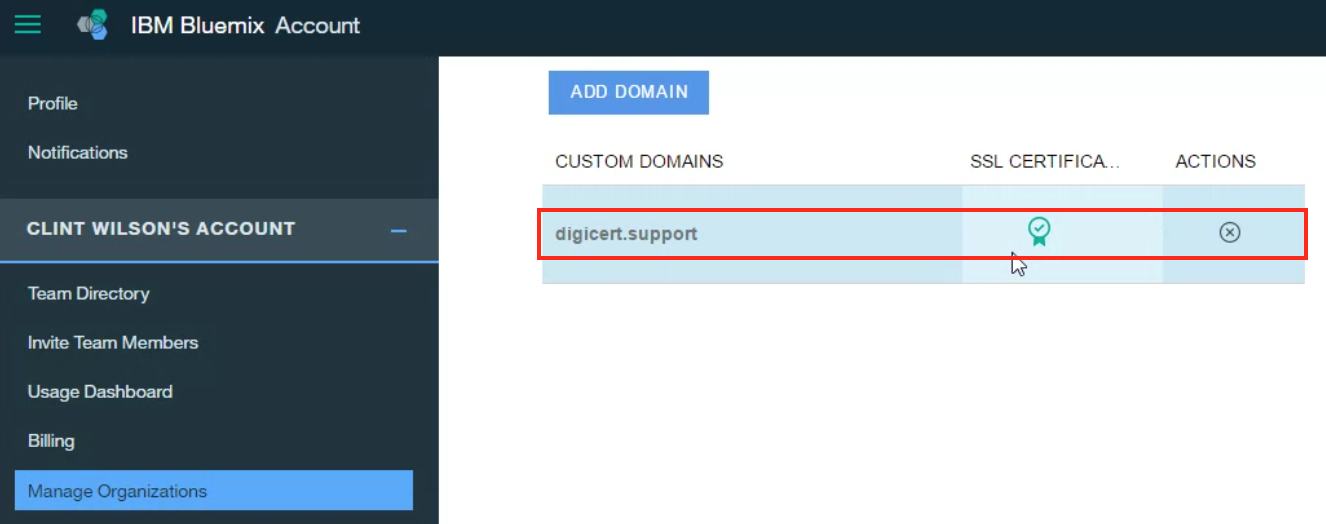
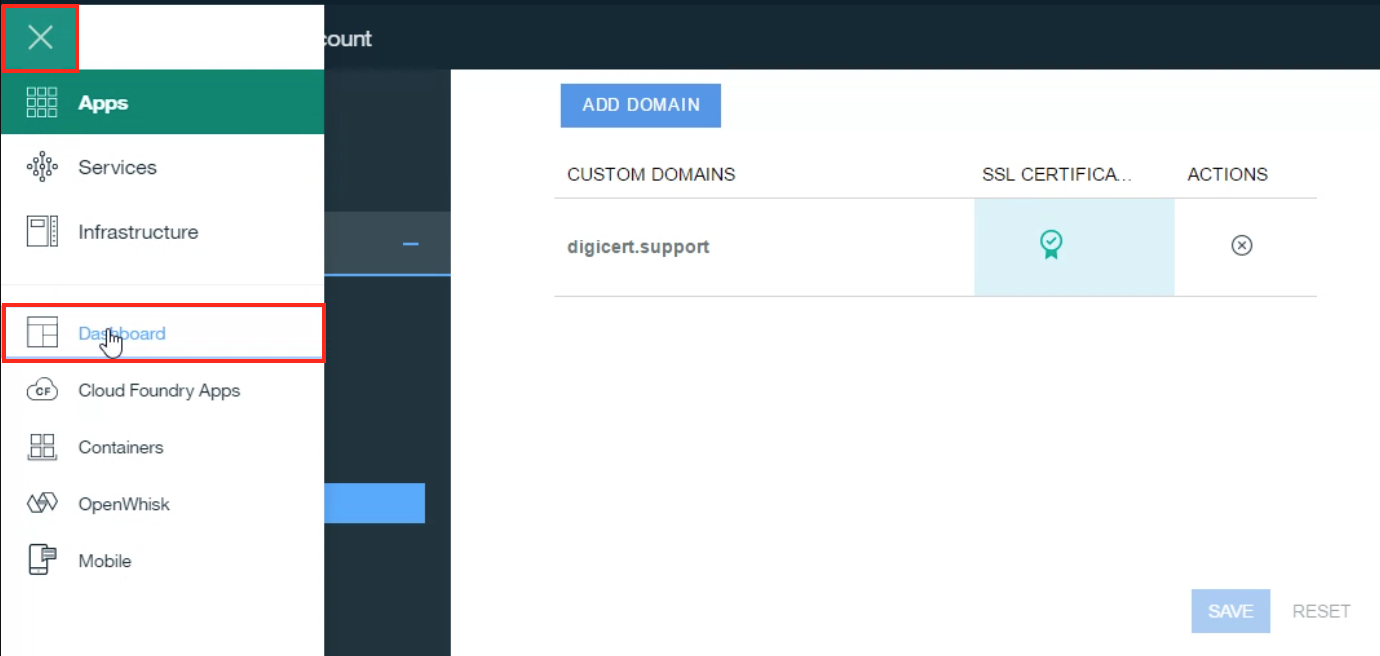
Within the Manage Organizations section, on the Add Domain page, to the right of the application in the SSL Certificate column, you should see a green certificate symbol.
Note: After you upload your certificate, it may take some time to propagate the certificate chain to the apps.
-
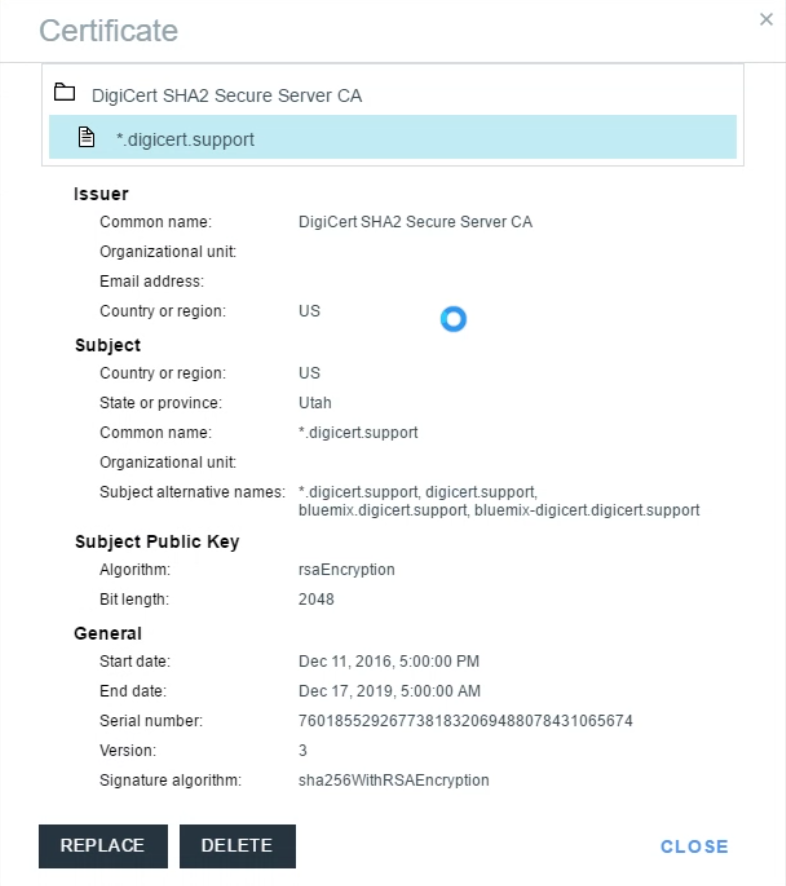
Click the green certificate symbol to view the uploaded certificate.
-
To verify that your application is using your SSL certificate, do the following:
-
Navigate to the application Dashboard.
-
On the Dashboard select the application that you secured with the SSL certificate.
-
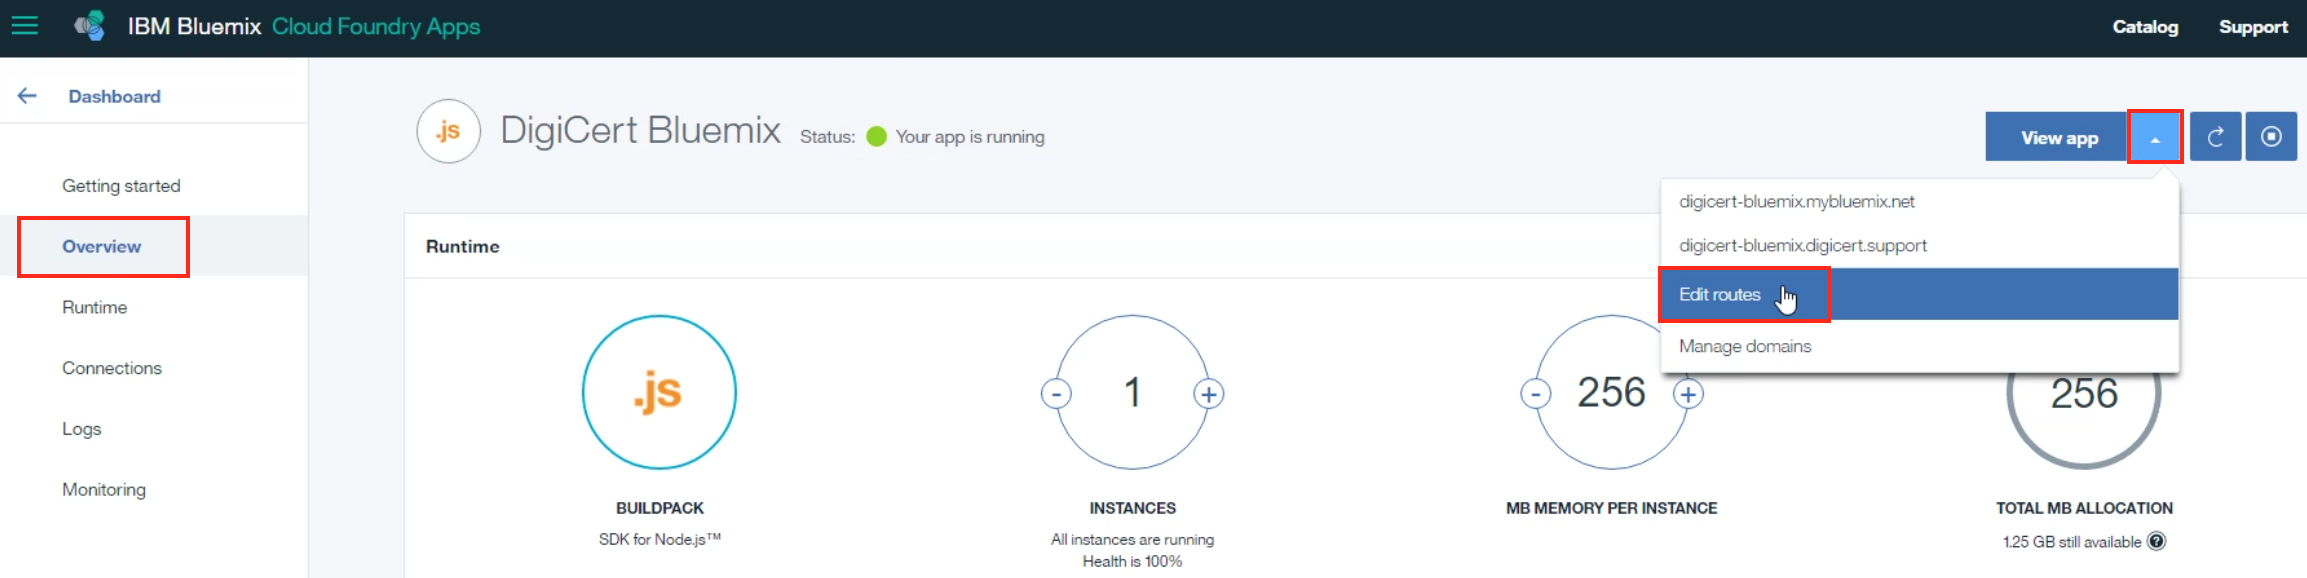
On the app Overview page, next to View app, click the down arrow and select Edit routes.
-
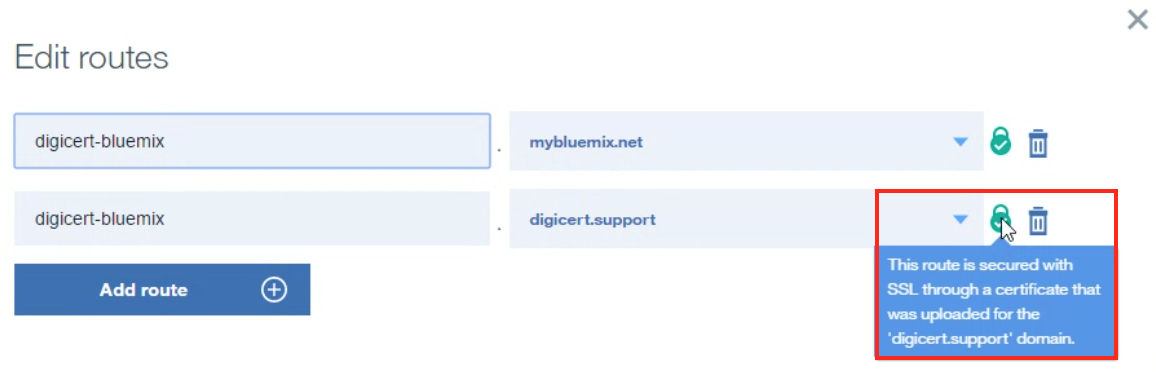
In the Edit routes window, to the right of the application you just secured, click the green lock to verify that the route has been secured.
-
-
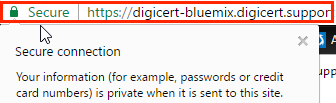
As a final check, open your application in a browser and in the address bar. Click on the green lock to the left of the URL and then, view the certificate details.
Note: After you upload your certificate, it may take some time to propagate the certificate chain to the apps.
-
Congratulations! You have successfully installed your application's SSL certificate.