
Clearly, you have a brilliant mind. You’ve already made the best DNS decision you could’ve possibly made for your organization—you’re with us! Now all you need to do is add your domain into your DNS Made Easy account so that you can reap the benefits! The process is simple, and we’re sure you could figure this out all on your own—but we’re here to make your job easier. Whether you need it or not, we’ve got your back every step of the way.
Adding a Domain into Your DNS Made Easy Account
This is a step-by-step guide for adding a domain into your account, with and without advanced options. Both methods are simple and quick, and you can always configure advanced DNS options later if you’re not sure what you need right now.
This tutorial assumes the following:
- You have a hosted domain ready to add to DNS Made Easy.
- You do not have a domain added to your account or you are adding a domain for the first time to an existing account.
- You know how to add name servers to your registrar.
Domain Name – Adding a Domain to DNS Made Easy
Step 1: Navigate to the Managed DNS section of the dashboard
After logging in, hover over the blue DNS tab at the top of the screen and select Managed DNS. Alternatively, you can click on any domain in the Recently Updated Domain List (if any).
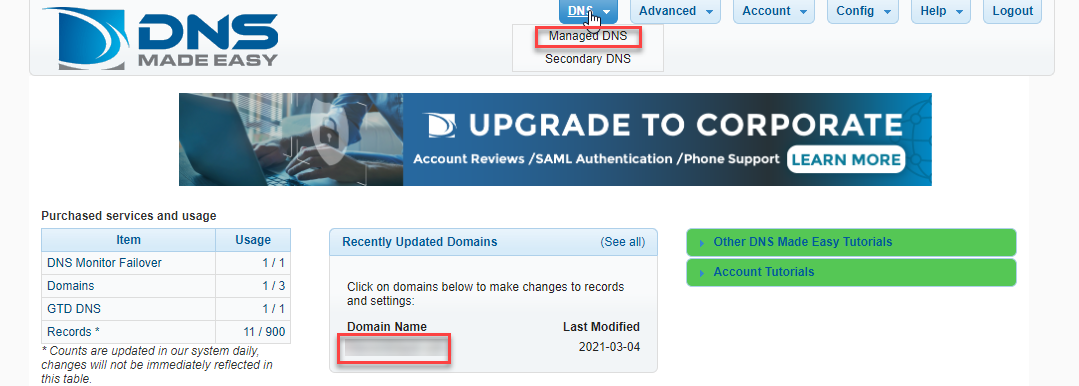
Tip: DNS Made Easy lets you add up to 1,000 domains at once, which can even be configured the same to save valuable time.
Step 2: Adding a Domain with basic DNS configurations
Once in the Managed DNS section, click on the Add Domains button at the top right (above the Managed DNS Tutorials section). A popup window will appear that will allow you to add your domain.
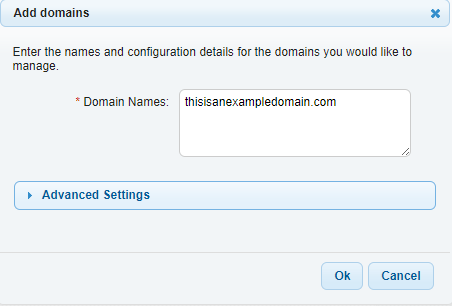
- Enter your domain in the Domain Names field (see step 4 for details on advanced settings).
- Once you’ve added your domain(s), click the OK button.
- Next, a success window will popup with the name servers for your domain. This is the information you’ll need for your registrar. Click OK to continue.
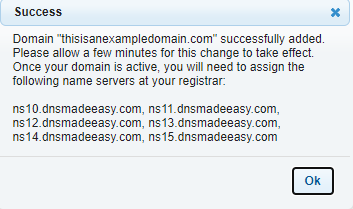
Tip: Be sure to add your records before delegating name servers at your registrar to avoid any “records not found” errors when someone tries to access your website.
Step 3: Add Your Records For Your Domain
After clicking OK in the success window, you’ll automatically be directed to the Records page in the Managed DNS section of the dashboard.
We have tutorials for creating records if you need help
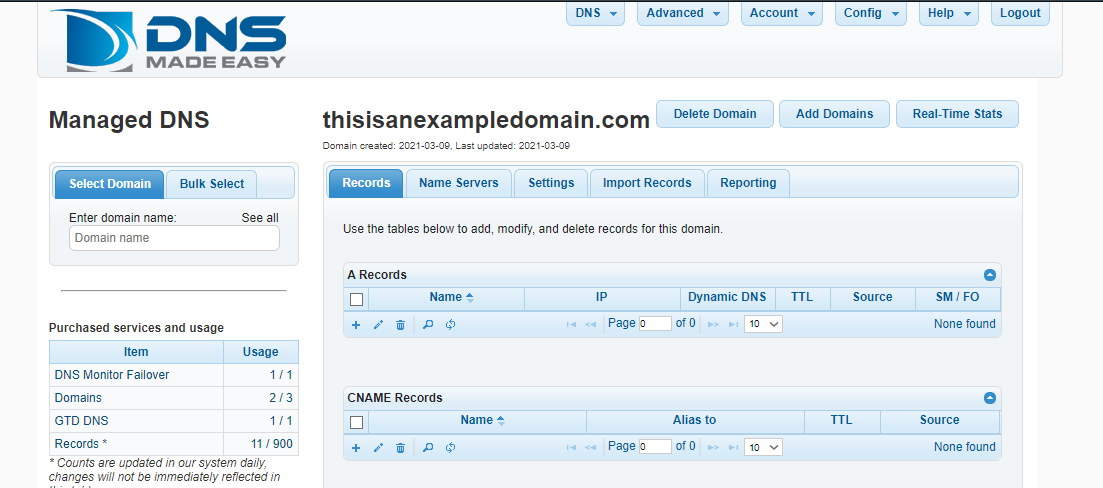
Note: It can take up to 10 minutes for DNS Made Easy to finish adding your domain, as it is being added to the 2,000 name servers in our IP AnyCast+ network. While your domain is being added it will say (creating) by the domain name.
Step 4: Adding a Domain With Advanced DNS Configurations
The process for adding a domain is the same for this step, but instead of clicking OK after entering your domain in the domain field, click on Advanced Settings.
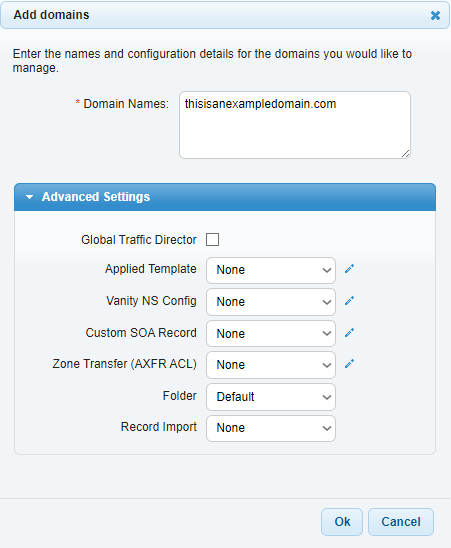
Global Traffic Director
Check the box next to Global Traffic Director if you’d like different query responses based on region.
Applied Template for DNS Records
Using templates for DNS records can be a huge time saver. It lets you apply the same standards and configurations to all of your domains at once. If any changes are made to your template, then it will update all records that use the template.
Tip: DNS templates are useful for web hosting companies or for organizations with especially large websites.
Vanity Name Server Configuration
The Vanity NS Config option allows you to rebrand or white label our name servers for brand recognition. This feature is also ideal for web hosting companies or for security purposes if your servers are on-site.
Custom Start of Authority (SOA) Record
At DNS Made Easy, we provide you with two preconfigured options for SOA records: standard and best practices, as well as the ability to customize your SOA record to your exact specifications.
Zone Transfer (AXFR ACL)
Our AXFR ACL option lets you run your own secondary name servers from our servers. Any changes made through our control panel or API, we’ll automatically send a notification, which will trigger an IXFR/AXFR transfer between all name servers so that the same records will be propagated everywhere.
DNS Permissions Folders
The folder feature allows you to group users within your organization into permission-based segments. You can configure unique read/write privileges for each domain. Here’s a tutorial on how to set up user permissions in your DNS Made Easy account.
DNS Record Import
Another time-saving feature is our record import option. This option allows you to copy DNS records from an existing template or domain in DNS Made Easy. If supported by your previous provider, you can also transfer your records from an external domain via IXFR/AXFR.
That’s a Wrap!
You should now have your domain added to your DNS Made Easy account. If you chose not to select any advanced configurations at this time, you can refer back to this blog, or visit our Knowledge Base, which is chock-full of tutorials on our advanced features. And if you still need help, you can reach out to our support team, who’ll be happy to assist you.

Featured Stories

PQC (Post-Quantum Cryptography)05-28-2026
DigiCert’s 2029 post-quantum infrastructure migration plan
.png)

Certificate Lifecycle Management04-24-2026
Certificate lifecycle management reaches an inflection point
-

DigiCert is a global leader in intelligent trust, securing people, data, and devices with AI-powered solutions built to stop threats today and prepare for a quantum-safe future.
-


-
© 2026 DigiCert, Inc. All rights reserved.
Legal Repository Audits & Certifications Terms of Use Privacy Center Accessibility Cookie Settings